
How to Queue Samples?
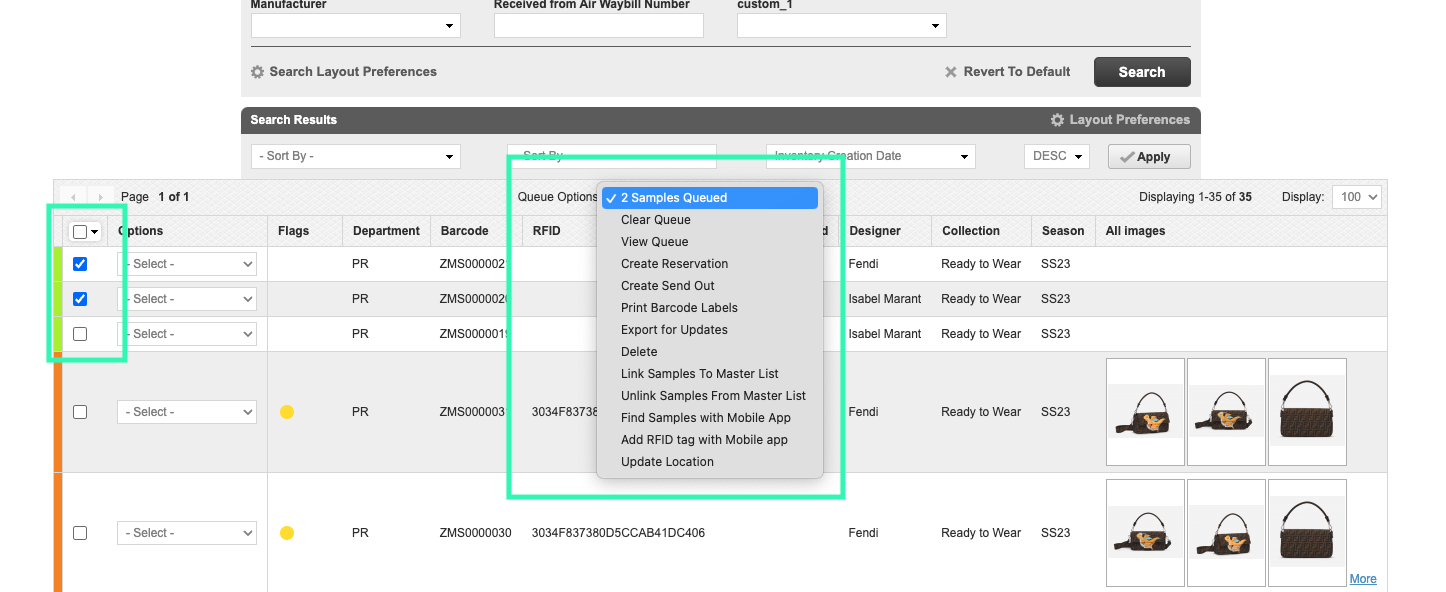
Create a queue to perform an action on one or more samples by checking off the small box to the left of each of the samples you wish to queue.
- The number of items queued will be visible directly beneath the Search Results grey bar
- if you have checked off two items it will say “2 Samples Queued”
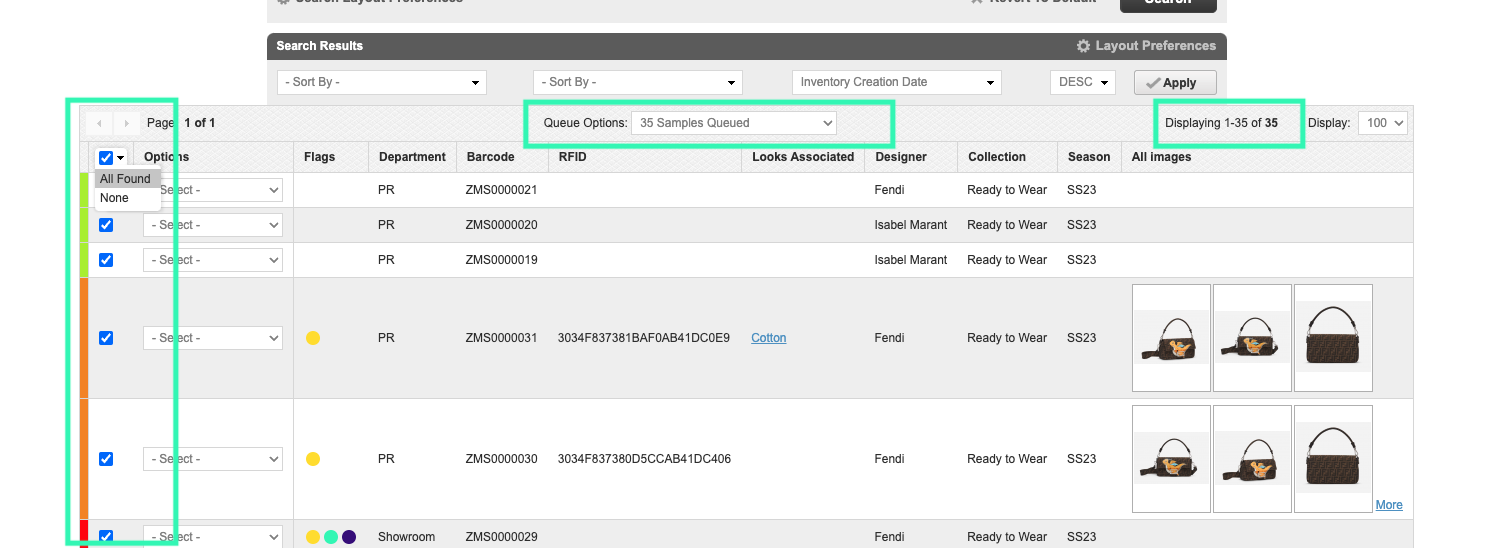
- To queue all your samples from a specific search, select the first check box at the top of the search results.
- This will queue all samples found matching your search results.
Queue Options
There are a few options that can be performed on multiple samples once they are queued:
-
Clear Queue removes all samples from your queue.
- It is important to clear your queue if you decide not to take any further action, since samples remain in your queue until an action is taken (which could lead to mistakes on future lists).
-
View Queue generates a pop-up screen with details of all samples in your queue.
- You can manage the layout preferences of this pop-up and remove unwanted samples from your queue.
- Create Reservation will take you to the Send Out tab and automatically select “Reservation” from the “Loan Type” dropdown menu.
- Create Send Out will take you to the Send Out tab and automatically select “Loan” from the “Loan Type” dropdown menu.
- Print Barcode Labels will print the barcode labels of all samples in your queue.
- Export for update will generate an Excel file with the selected samples to be updated in Excel and imported back for updates in Launchmetrics.
-
Delete will delete all samples in your queue.
- Please note that this action is permanent. Recovering samples that have been deleted is a paid service
- Archive will send all samples in your queue to your archived inventory.
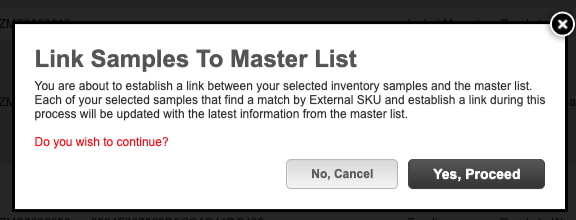
- Link samples to Master List will automatically link the selected samples to your master list using their external SKU.
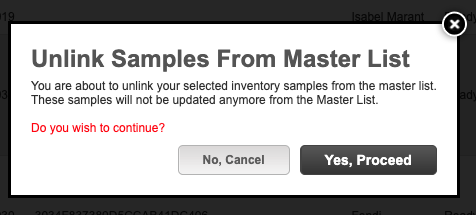
- Unlink samples to Master List will unlink the selected samples to your master list.
- Find Samples in Mobile App will send selected samples list to your mobile app to easily search for them with the RFID scanner device.

- Add RFID tag with Mobile App will send selected samples list to your mobile app to easily assign them an RFID tag.

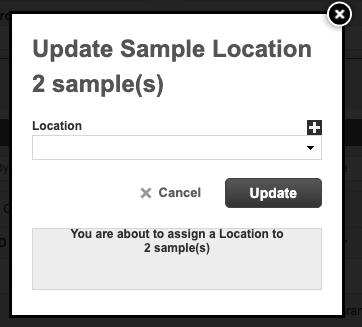
- Update Location will open a pop-up allowing you to select a location to which you want to move your selected samples to.
Access to options
Based on your permissions some actions may not be available.
Also, note that samples from a department you have limited access to can not be queued.