
Request Manager

Creating A Request
- Add a new request by clicking the “Create Request” button in the upper right corner of the page.
- A request can be used as a reminder for upcoming pulls. Multiple users can request samples on the same date; a request simply serves as a reminder that something needs to be sent out on a particular date.
Searching for Requests
- To find an existing request or reservation, go to your Requests tab and select Request Manager, then use the search fields at the top of the page.
- A useful field is the "Status" drop-down menu. You can filter by Pending, Declined, Approved and Reserved, or Converted to Delivery.
- Approved and Reserved only includes requests that have been converted into reservations.
- Converted to Delivery is a new status for requests that have ultimately become open send outs.
.png)
- Use the "Sort by" drop-down to arrange requests in your preferred order.
- Choose from the "Display" drop-down at the top or bottom of the page to select how many requests you would like to see.
- Use the Color Legend to visually scan through your search results. Each status has its own colour: Pending, Declined, Approved and Reserved, and Converted to Delivery. You can find the legend by clicking the ? icon next to the Request Manager title.

Editing and Converting Requests
The send-out process can go from Request → Reservation → Delivery, but it doesn't have to. You can skip any step depending on your needs.
- To edit a request, click on the Options drop-down menu.
- For Pending requests, you'll see "Convert to…" in the Options drop-down menu. This allows you to convert your request to a Reservation, loan, transfer, purchase or gift.
- The options you see depend on the stage of the request or reservation, as well as the date. For example, reservations will show different options depending on whether the reservation date has already passed or is still in the future.

Reservations
A reservation sets aside samples for a specific date range in the future. Unlike requests, samples cannot be used for any other send-out when they are on a reservation. If another user attempts to scan out samples while they are reserved, they will receive an error message and the samples will not be added to their loan.
- Approved requests have a Go to reservation(s) menu option, and requests converted to a delivery have a Go to deliveries option. Both jump straight to the linked send out in the Send Out Manager, where you can manage your send out.
.png)
Confirming Outgoing Samples
When you're ready to convert a reservation into a loan or transfer, the samples you originally reserved may no longer be available. The Confirm Outgoing Samples feature lets you quickly scan, confirm, or swap out samples or styles based on their current availability.
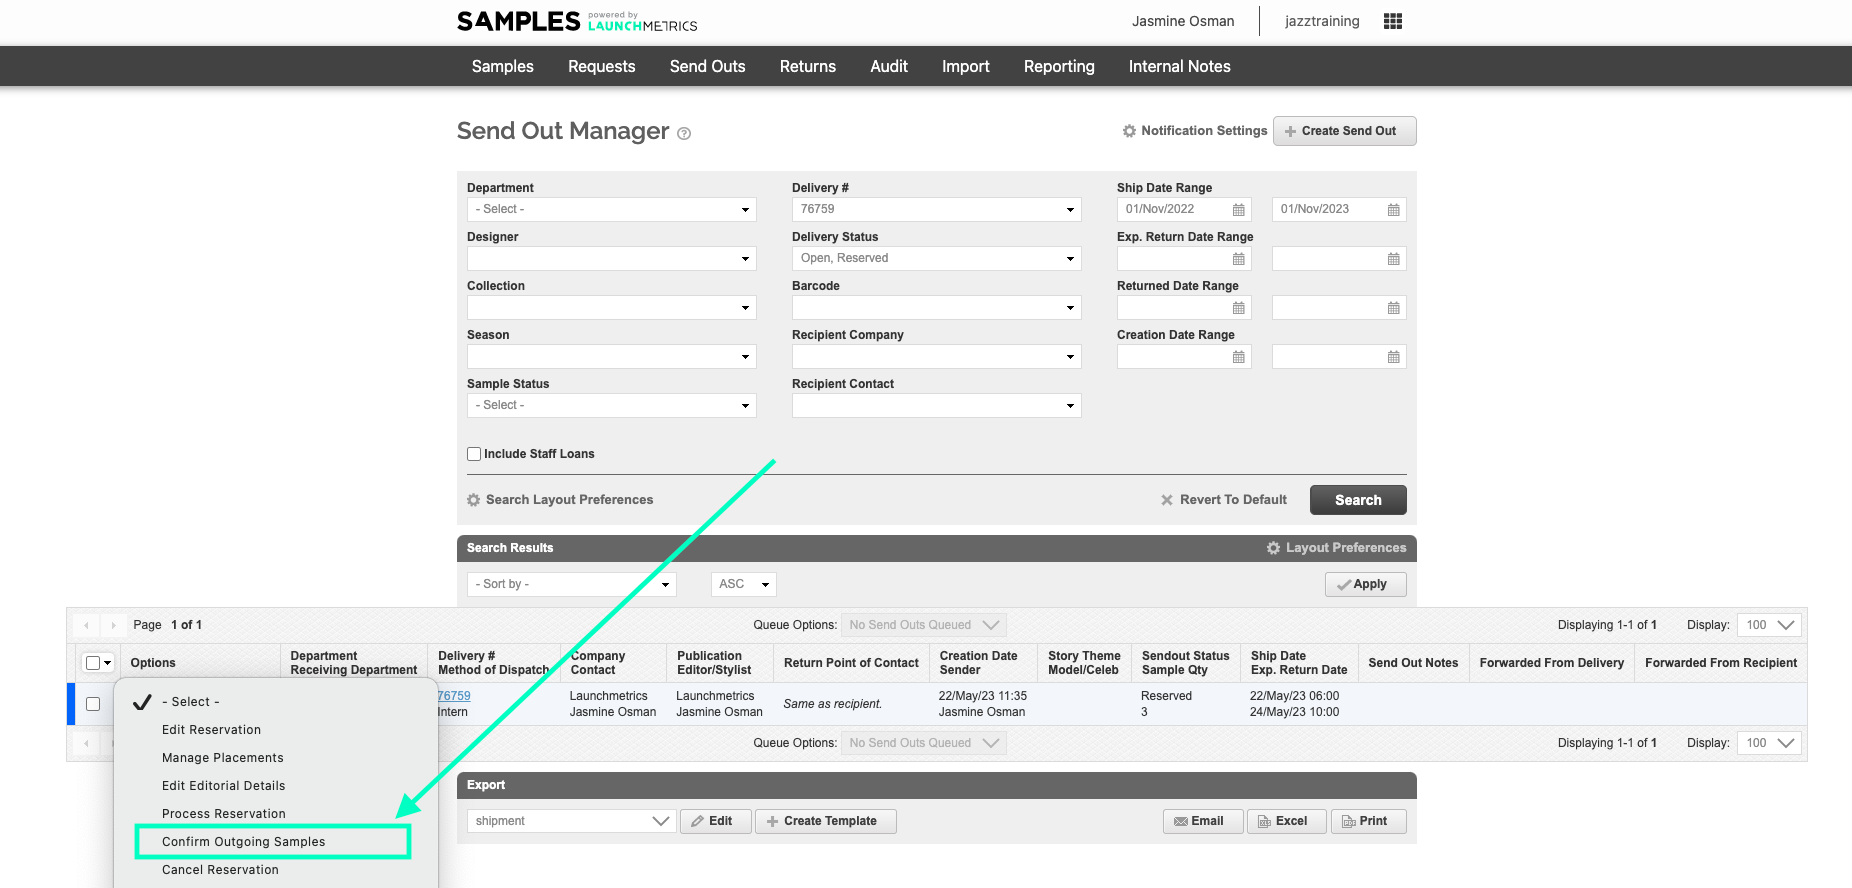
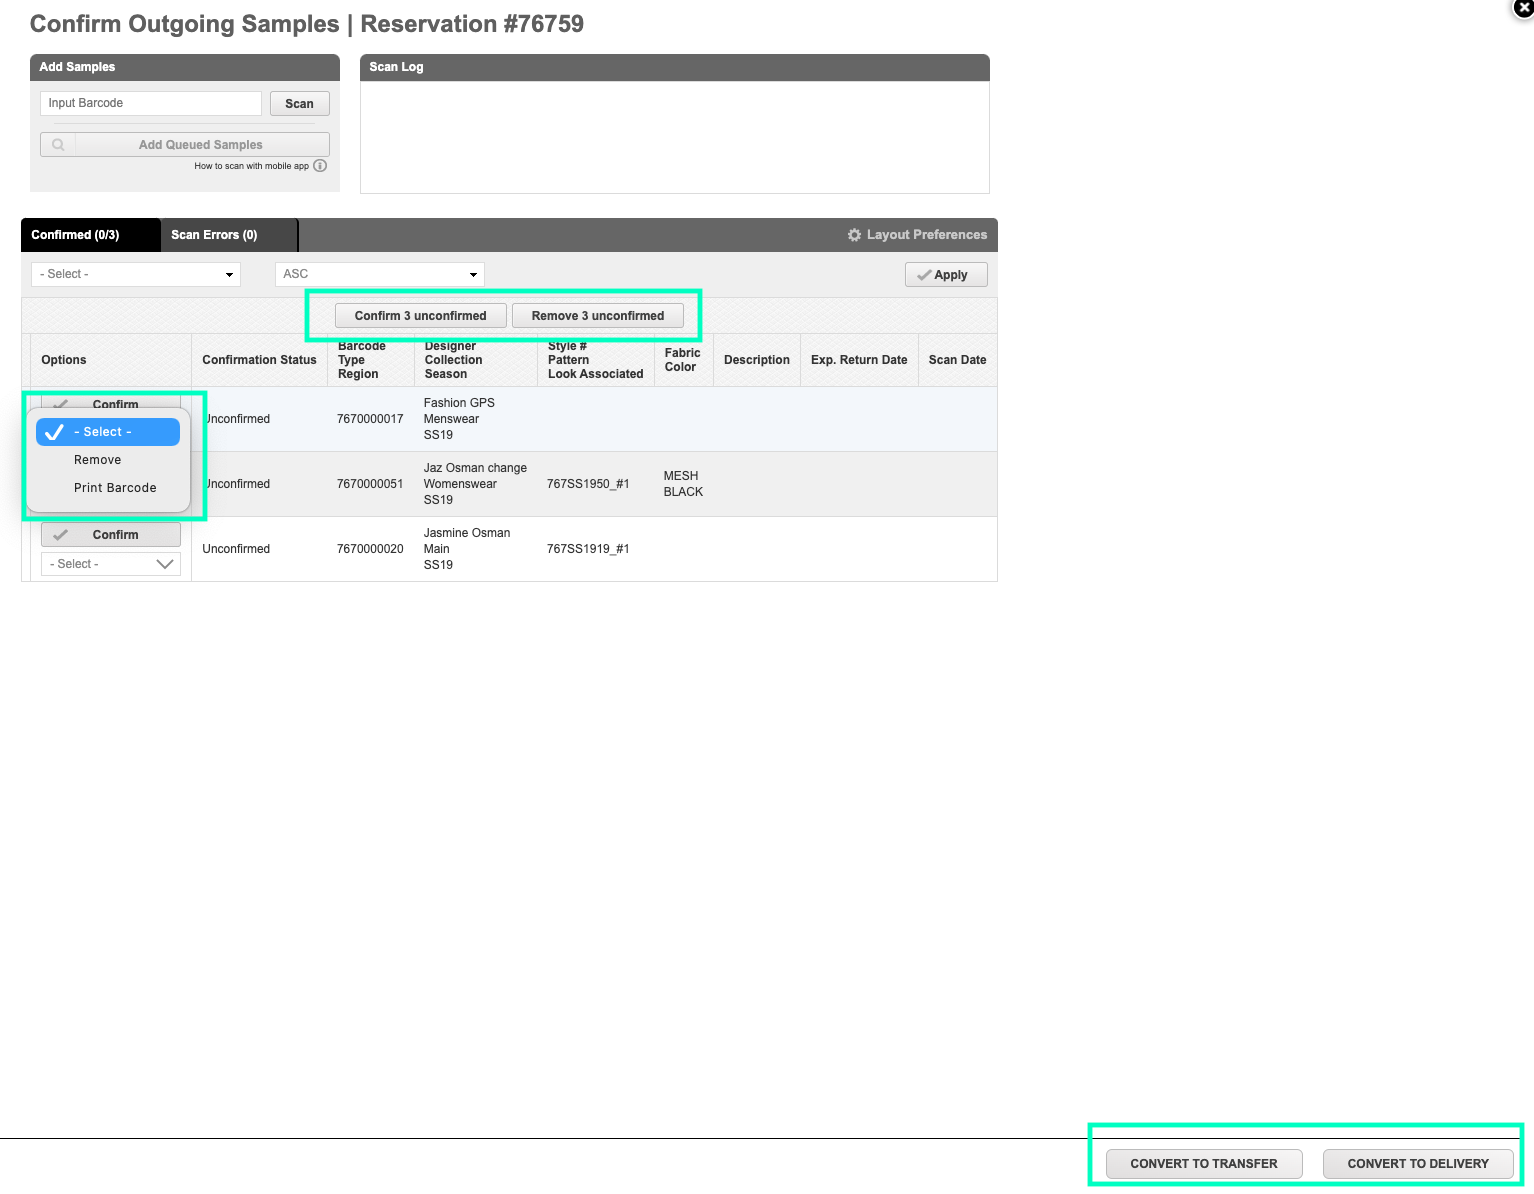
After clicking "Confirm Outgoing Samples", you'll be taken to a scanning screen. Here you scan the samples you are actually sending out, which may be a different duplicate sample from the one on the original request or reservation.
On this page you can:
- Confirm/Unconfirm a sample
- Remove a sample
- Print Barcode
- Convert to Transfer
- Convert to Delivery
Options for Sample Confirmation
Your Customer Success Manager can configure your platform to use one of two confirmation methods:
- Item-based: the item itself (with its unique barcode or RFID) must be on the reservation for it to confirm successfully.
- Style-based: as long as an item of the same style number is on the reservation, the item can be confirmed and is switched automatically. For example, you reserved sample GPS12345 (style A1B), but it's still out with another contact, so you grab GPS6789, a duplicate of style A1B. When you scan GPS6789, the system automatically removes GPS12345 and replaces it with GPS6789. This can save a lot of time and improve accountability, but it may not be a good fit if you typically send out several duplicates of the same style in a single send out.
Your Customer Success Manager can help you decide which configuration works best for you.
Note: You can scan regular 2D barcodes on the web and in the mobile app. RFID sample tags can be scanned in the mobile app, but the queue must be processed on the web for the confirmation step.