
RFID Invitations
Pair your scanner and assign an RFID tag to each of your invitees

The preferred scanner for assigning RFID tags and checking in invitees at your shows is the ACM-e devide UHF Scanner by ACM-e.

To pair the scanner with your computer, go to System Preferences and select "Bluetooth".
Alternatively, you can connect your scanner through the USB port of your computer.

Search for "EVTE4B323F81BE8" and click on Pair. You are now ready to use the scanner to assign RFID #s to your invitees.
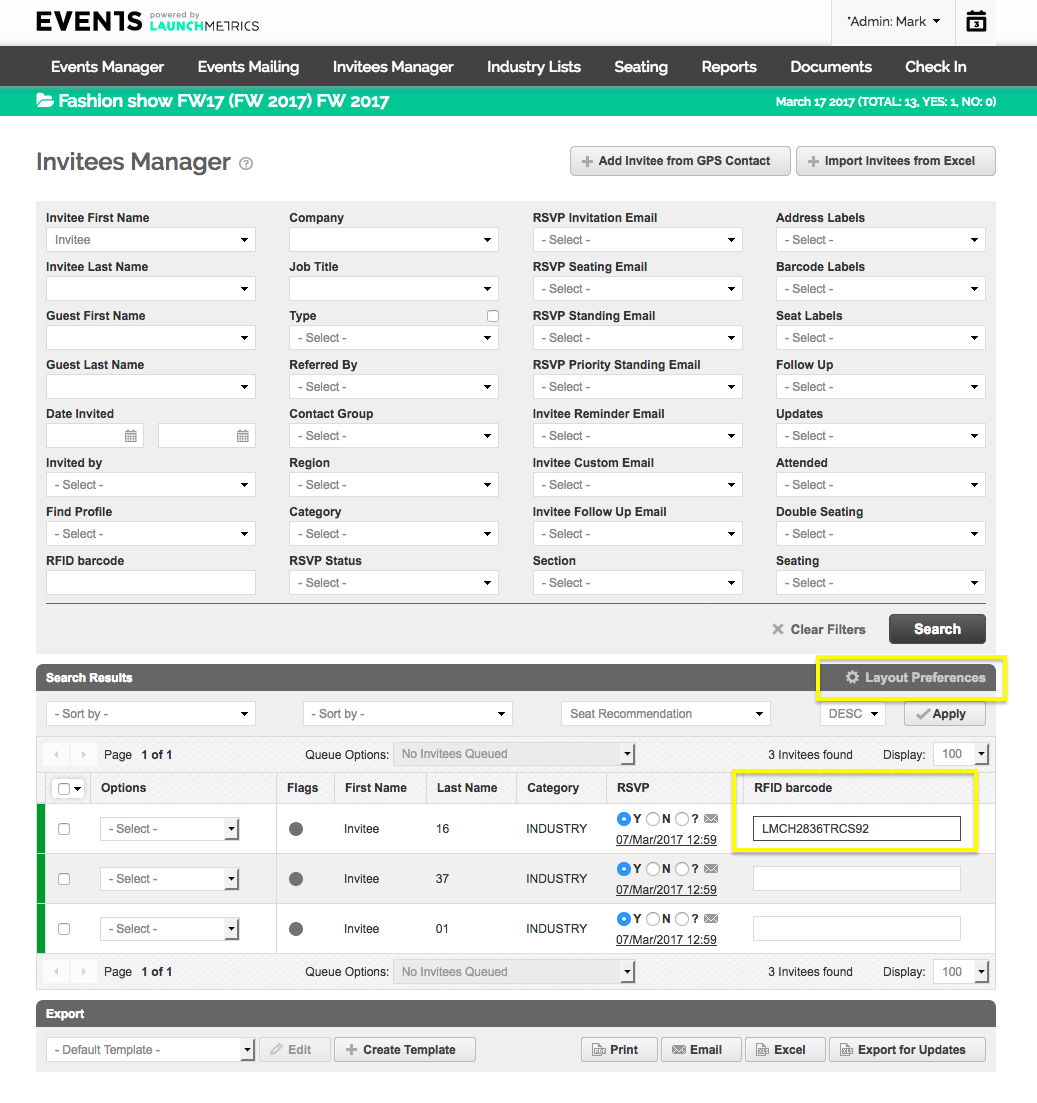
- In Invitees Manager, select "RFID Barcode" from Layout Preferences.
- Scan the UHF barcode on the invitation that corresponds to the correct Invitee. The RFID Barcode number will appear under the "RFID Barcode" field.
- Once you scan, the system will save the RFID Barcode automatically to that person.
- UHF Barcode stickers can be placed directly on an invitation or embedded within the invitation so it is invisible to your Invitees.
NOTE: You cannot assign an UHF RFID to an Invitee that has already been marked as "Attended".
The day of the Event
- On the day of your event, pair the ACM-e device scanner with the iPad/iPhone you are planning to check Invitees in with.
- Go to Settings --> Bluetooth and select "EVTE4B323F81BE8".

Within the Events app, in order to be able to activate the RFID reading:
1. Go to settings and enable the RFID

2. Click on your Event and click on "scanning".

As invitees come through, use the scanner to scan their invitations and check them in to your show.