

Outlookで背景画像が表示されないのはなぜですか?
メールに背景画像を追加した場合、Outlookユーザーから「背景が真っ白になった」というフィードバックを受けたことがあるかもしれません。
Outlookでは、画像の高さに1728ピクセルのサイズ制限があります。
すべてのメールプロバイダで正しく表示されるように、画像の高さが1728ピクセル以下であることを確認してください。
画像サイズを変更する方法は?
PCで直接変更する方法:
- Windowsの場合、ペイントを使ってJPEGを開き、「すべてを選択」をクリックし、縦横をパーセンテージまたはピクセルの長さで調整する。その後、「名前を付けて保存」を選択し、"JPEG "を選択します。
- Macの場合は、プレビューでJPEGを開き、「ツール 」から 「サイズの調整 」をクリックします。高さと幅をパーセントまたはピクセル長で調整し、「OK 」をクリックし、「保存 」をクリックします。
または、画像サイズ変更ウェブサイトを利用することもできます。
レイアウトが変わってしまうことを避けるために、サイズ変更中に比率が維持されていることを確認してください。
可能であれば、画像提供元と直接連絡を取り、この要件を満たすように画像をデザインしてもらうことをお勧めします。
プレビュー時にコンテンツが消えるのはなぜですか?
メーリングのプレビューで特定のコンテンツが表示されない場合、2つの理由が考えられます。
1つは、Microsoft Wordなどの他のテキストエディタからコンテンツやデザインの一部をコピーした可能性があります。その場合、コピーされた書式がプレビューでレンダリングされず、反映されないことがあります。
Microsoft Wordから非表示書式なしでテキストをコピーする方法::
- MS Wordファイルを開きます。
- [ファイル]メニューをクリックし、 [名前を付けて保存]をクリックします。
- [ファイルの種類]メニューで、 [テキスト (*.txt)]を選択します。
- 保存したら、保存した.txtファイルをダブルクリックして開きます。おそらくメモ帳アプリで開くでしょう。
- ここからメーリングの[Design]にテキストをコピーすることができます。
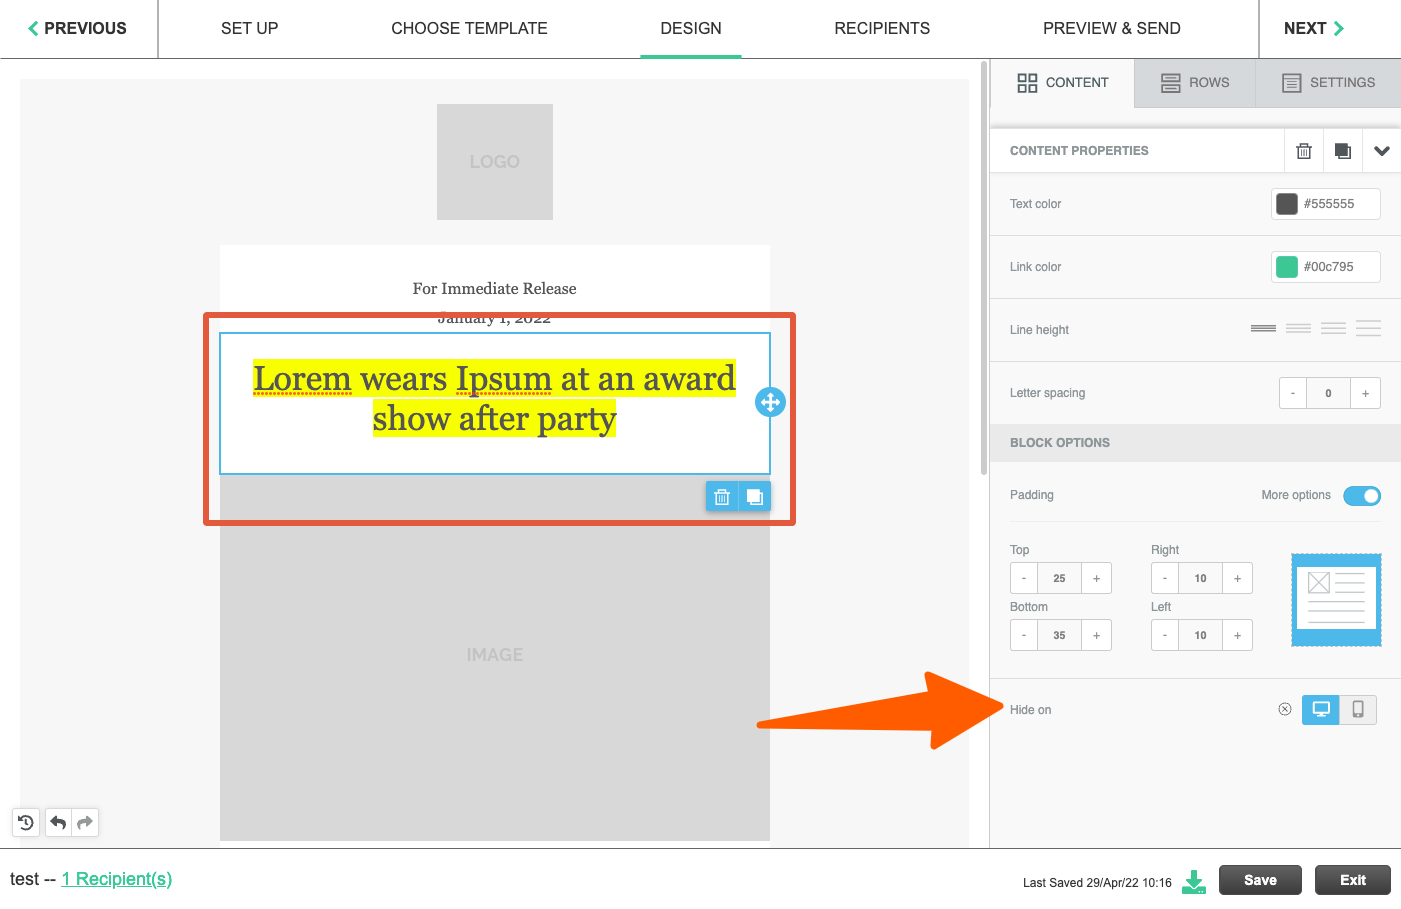
もう1つの理由は、PCまたはモバイルでコンテンツを非表示にするオプションが選択されている可能性があります。
確認方法:
- [Design]タブに移動し、非表示になっているブロックをクリックします。
- 右側のパネルを見て、一番下までスクロールします。
- 2つのボタンのどちらかが青く表示されている場合、そのデバイス(PCまたはモバイル)で見たときにブロック全体が非表示になることを意味します。この設定を削除するには、[X]アイコンをクリックします。
“Failed email messages”は何を意味しますか?
Failed Email Explanations
Below outlines the most common failed email errors and what you can do to correct...
If you are having trouble with the deliveries of mailings, please try whitelisting Launchmetrics IP address.
You can request this from the support team: Support@launchmetrics.com.
Below outlines the most common failed email errors and what you can do to correct them.
| Error message | Explanation |
|---|---|
|
Your message was rejected due to its content |
This email content contains words or images that the recipient’s mailbox rejects. |
|
The email address is invalid |
The recipient’s email address no longer exists. |
|
The email address is unsubscribed |
The recipient has opted our of receiving emails from your site, the person must access the unsubscribe link again to re-subscribe. |
|
The domain of the email address is invalid |
The email address domain (ex. @domain.com) is not a valid domain. |
|
The email address is not in a valid format |
Please check that the format of the email address is correct (spelled correctly, no symbols, etc.). |
|
The email address was rejected |
Something is wrong with the actual email address. It may not exist or may not be active. |
|
The recipient’s mailbox is full or over quota |
The recipient’s mailbox is full. Contact the recipient and tell them to clear some space in their mailbox |
|
Recipient email account is inactive/disabled |
Something is wrong with the actual email address. It may not exist or may not be active. |
|
Your email address was rejected |
The recipient’s anti-virus may be blocking the delivery of your email. |
|
Protocol error, invalid command or timeout |
There is a problem with the recipient’s server. Please contact the recipient. |
|
Unable to connect to recipient’s mail server |
There is a problem with the recipient’s server. Please contact the recipient. |
|
Your message was rejected because the receiving server is not accepting mail for the destination domain |
There is a problem with the recipient’s server. Please contact the recipient. |
| Requested mail action aborted, Mailbox not found | The recipient mailbox is no longer available (the mailbox was deleted due to the inactivity state of the account) - or the mailbox is full and can no longer receive additional emails. |
| No such user here in response | The recipient's email address doesn’t exist (maybe it was incorrect introduced in the system) |
| Your message was rejected due to content | The email was rejected by the recipient server which probably has a filter that parses the incoming messages, and didn’t liked the content of these email, probably it was considered spam. |
|
Out of office / Auto-reply |
Out of office replies are included in the “Failed” tab to call attention to this individual, in case you would like to forward the invite elsewhere. The invite was delivered to the recipient’s inbox. |
|
This email address is on a suppression list |
The recipient flagged a Launchmetrics email as abuse. They must request to be removed from this suppression list. |
| 550 Rejected by header based Anti-Spoofing policy |
The email FROM domain is the same as the email TO domain and the customer's IT has set up a spam filter.
|
| [Permanent failure] Name service error for xxxx.xxx Type=A: Host not found. | The domain name to which you sent the message does not exist. Usually, this means you misspelled the domain name, but it may indicate a problem with the domain's record that prevents the domain from being found. |
| [Permanent failure] 550 RCPT TO:<xxxx@xxx.xx> User unknown In response to the RCPT TO command.. | The recipient’s email address does not exist. Most likely you used a wrong or misspelled email address (check the address for typos) or the person you sent the mail to doesn’t exist anymore at the company you’re trying to send the mail to. |
| Failed delivery to the Primary Email xxxx@xxx.xx on XX/xx/XXXX xx:xx. Reason: [Permanent failure] 5.0.0. | The email message could not be delivered because of an unknown issue. The recipient server did not disclose the reason it rejected the message. |
[SEND(送信)] をクリックした時刻またはスケジュールされた時刻と、受信者が電子メールを受信する時刻の間に遅れが生じるのはなぜですか?
電子メールをディスパッチするプロセスを管理するキューがあるため、その量、または Launchmetrics サーバーでその時点で送信される電子メールの量に応じて、待ち時間が変化する可能性があります。
さらに、受信者の数は、各受信者が電子メールを受信するまでにかかる時間に影響を与える可能性があります。最初の受信者はサーバーがバッチを処理してから数秒後に電子メールを受信し、最後の受信者は数分後に電子メールを受信する可能性があります。
[SEND(送信)] をクリックした後、受信者リストへのメールの送信を取り消したり、停止したりする方法はありますか?
「いいえ」ございません。
イベント メーリングには削除ボタンが用意されていますが、これは送信された電子メールの履歴のみを削除します。
また、すでに送信されたメールの履歴を削除すると、それらの受信者からの READ / OPEN / CLICK 更新の収集が停止され、READ EMAIL ONLINE リンクが起動しなくなります。また、場合によっては、テンプレートの添付ファイル (リンクとして送信) が使用できなくなります。
ファイルマネージャーでアップロードできる最大ファイルサイズはどれくらいですか?
12メガバイトです。
添付ファイルが許可されている最大数を超えた場合はどうすればよいですか?
Attaching large files to a Mailing
If you’d like to allow your recipients to download a file or files greater than t...
If you’d like to allow your recipients to download a file or files greater than the allotted attachment limit, you can include a link to download a file directly in the body of your email.
Drag & Drop Mode
Using a Button
- Add a button element by dragging from the Content panel
Click the button to activate the content properties panel on the right. Look for the “Actions” section. Click “Link File”

This will load your file manager. From here, upload your file.

- Note there is a 12mb per file limit to upload here
Then click the “Insert” button to link it back to your button
Now, when your recipients click the button, they will be redirected to the file.
Using a text link
Highlight the text that you would like to link to your file and click the “insert link” icon in the toolbar.
In the “Link Type” dropdown click “File Manager”. This will launch the file manager interface.
Upload your file and click “Insert”
- Note there is a 12mb per file limit to upload here
Click OK in the “Insert Link” window
Now, when your recipients click the button, they will be redirected to the file.
Alternatively, if you can host the file on another site or server. Just paste the link directly in the URL field and you don’t have to upload it to the file manager.
Manual Mode
Highlight the text that you would like to link to the file
Click the link icon in the toolbar to launch the Link editor
Click Browse and select the file on your computer
Click OK
Alternatively, if you already have the file hosted on another server or site, then you can just paste the URL into the URL field in the Link editor.
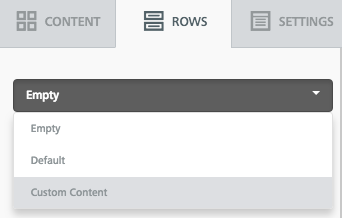
イベント招待状にバーコード/QR コードを追加するにはどうすればよいですか?
まず、QRコードをEvent detail 段階で有効にする必要があります。イベントの作成/編集detailで、[Enable Invitee Barcode Usage] 招待者のバーコードの使用を有効にするをクリックします。
ドラッグ&ドロップモード
- 上部の右側のパネルで、「ROWS」タブをクリックします。
- タブのすぐ下にある「Empty」というドロップダウンをクリックし、「Custom Content」を選択します。
- 3 つのバーコード サイズのいずれかをレイアウトにドラッグします
マニュアルモード
- ツールバーの「Add Special Elements」ボタンをクリックします。
- 3 つのバーコード サイズのいずれかの横にある + アイコンをクリックします

購読解除リンクを追加するにはどうすればよいですか?
Adding an Unsubscribe Link to a Mailing
All Contacts & Events templates include the unsubscribe link (even the blank ...
All Contacts & Events templates include the unsubscribe link (even the blank one). But if you’ve removed the unsubscribe link or are importing a design using source code, you can do this easily add the Launchmetrics unsubscribe link by following the instructions below:
Drag & Drop Mode
- Simply select some text that you’d like to hyperlink to the unsubscribe page, the word processing toolbar should appear above or below the text area.
- Click the “Special Links” button and click “Unsubscribe Link”.
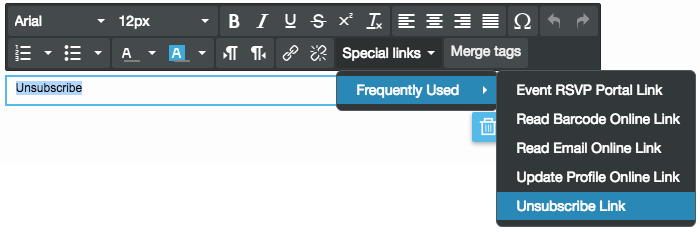
- If you click this button without having text highlighted, it will insert some text for you and hyperlink to the unsubscribe page.
- Now your recipients can click this link to unsubscribe
Manual Mode
- Click the “Add Special Elements” button in the toolbar

- Click the + icon next to “Unsubscribe Link”
This will insert some hyperlinked text into your layout. You may change the text as you please.
ファイルマネージャーで私のファイルを閲覧できるのは他に誰ですか?
"バケット"は Department + Product(App)で区切られています。たとえば、"New York Events" には 1 つのバケットがあり、"New York Contacts" には別のバケットがあり、"Paris Contacts" には別のバケットがあります。
システムは電子メールの統計をどれくらいの期間追跡しますか?
すべての電子メール統計 (開封数やクリック数など) を 3 か月間追跡します。
プレビュー テキストをカスタマイズするにはどうすればよいですか?
電子メールの最上部に、プレビュー テキストに使用される非表示要素を作成できます。
ドラッグ&ドロップモード
「デザイン」ステップで、右側のパネルの「コンテンツ」タブから HTML 要素上にドラッグします。電子メールのデザインの一番上にあることを確認してください。
クリックして HTML ブロックを編集します。
デフォルトのコードを削除し、次のコードを貼り付けます。
<div style="display:none; max-height:0px; overflow:hidden:">
Your custom preview text
</div>
<div style="display: none; max-height: 0px; overflow: hidden;"> ‌ ‌ ‌ ‌ ‌ ‌ ‌ ‌ ‌ ‌ ‌ ‌ ‌ ‌ ‌ ‌ ‌ ‌ ‌ ‌ ‌ ‌ ‌ ‌ ‌ ‌ ‌ ‌ ‌ ‌ ‌ ‌ ‌ ‌ ‌ ‌ ‌ ‌ ‌ ‌ ‌ ‌ ‌ ‌ ‌ ‌ ‌ ‌ ‌ ‌ ‌ ‌ <div>「カスタム プレビュー テキスト」と表示されている部分を、目的のプレビュー テキストに置き換えます。
注: プレビューに不要なテキストがまだ表示される場合は、以下のコードをさらに追加して (これはスペースとして表示されます)、それを押し出します。
‌ ‌ ‌ ‌ ‌ ‌ ‌ ‌ ‌ ‌ ‌ ‌ ‌
マニュアルモード
- 「設計」ステップで、「ソース」ボタンをクリックしてコードを表示します。
- body タブの先頭を探します。これを行うには、<body のページ検索を実行します。
- この行の後に、以下のコードを追加します。
「Your custom preview text」と表示されている部分を、目的のプレビュー テキストに置き換えます。
<div style="display:none; max-height:0px; overflow:hidden:">
Your custom preview text
</div>
<div style="display: none; max-height: 0px; overflow: hidden;"> ‌ ‌ ‌ ‌ ‌ ‌ ‌ ‌ ‌ ‌ ‌ ‌ ‌ ‌ ‌ ‌ ‌ ‌ ‌ ‌ ‌ ‌ ‌ ‌ ‌ ‌ ‌ ‌ ‌ ‌ ‌ ‌ ‌ ‌ ‌ ‌ ‌ ‌ ‌ ‌ ‌ ‌ ‌ ‌ ‌ ‌ ‌ ‌ ‌ ‌ ‌ ‌ <div>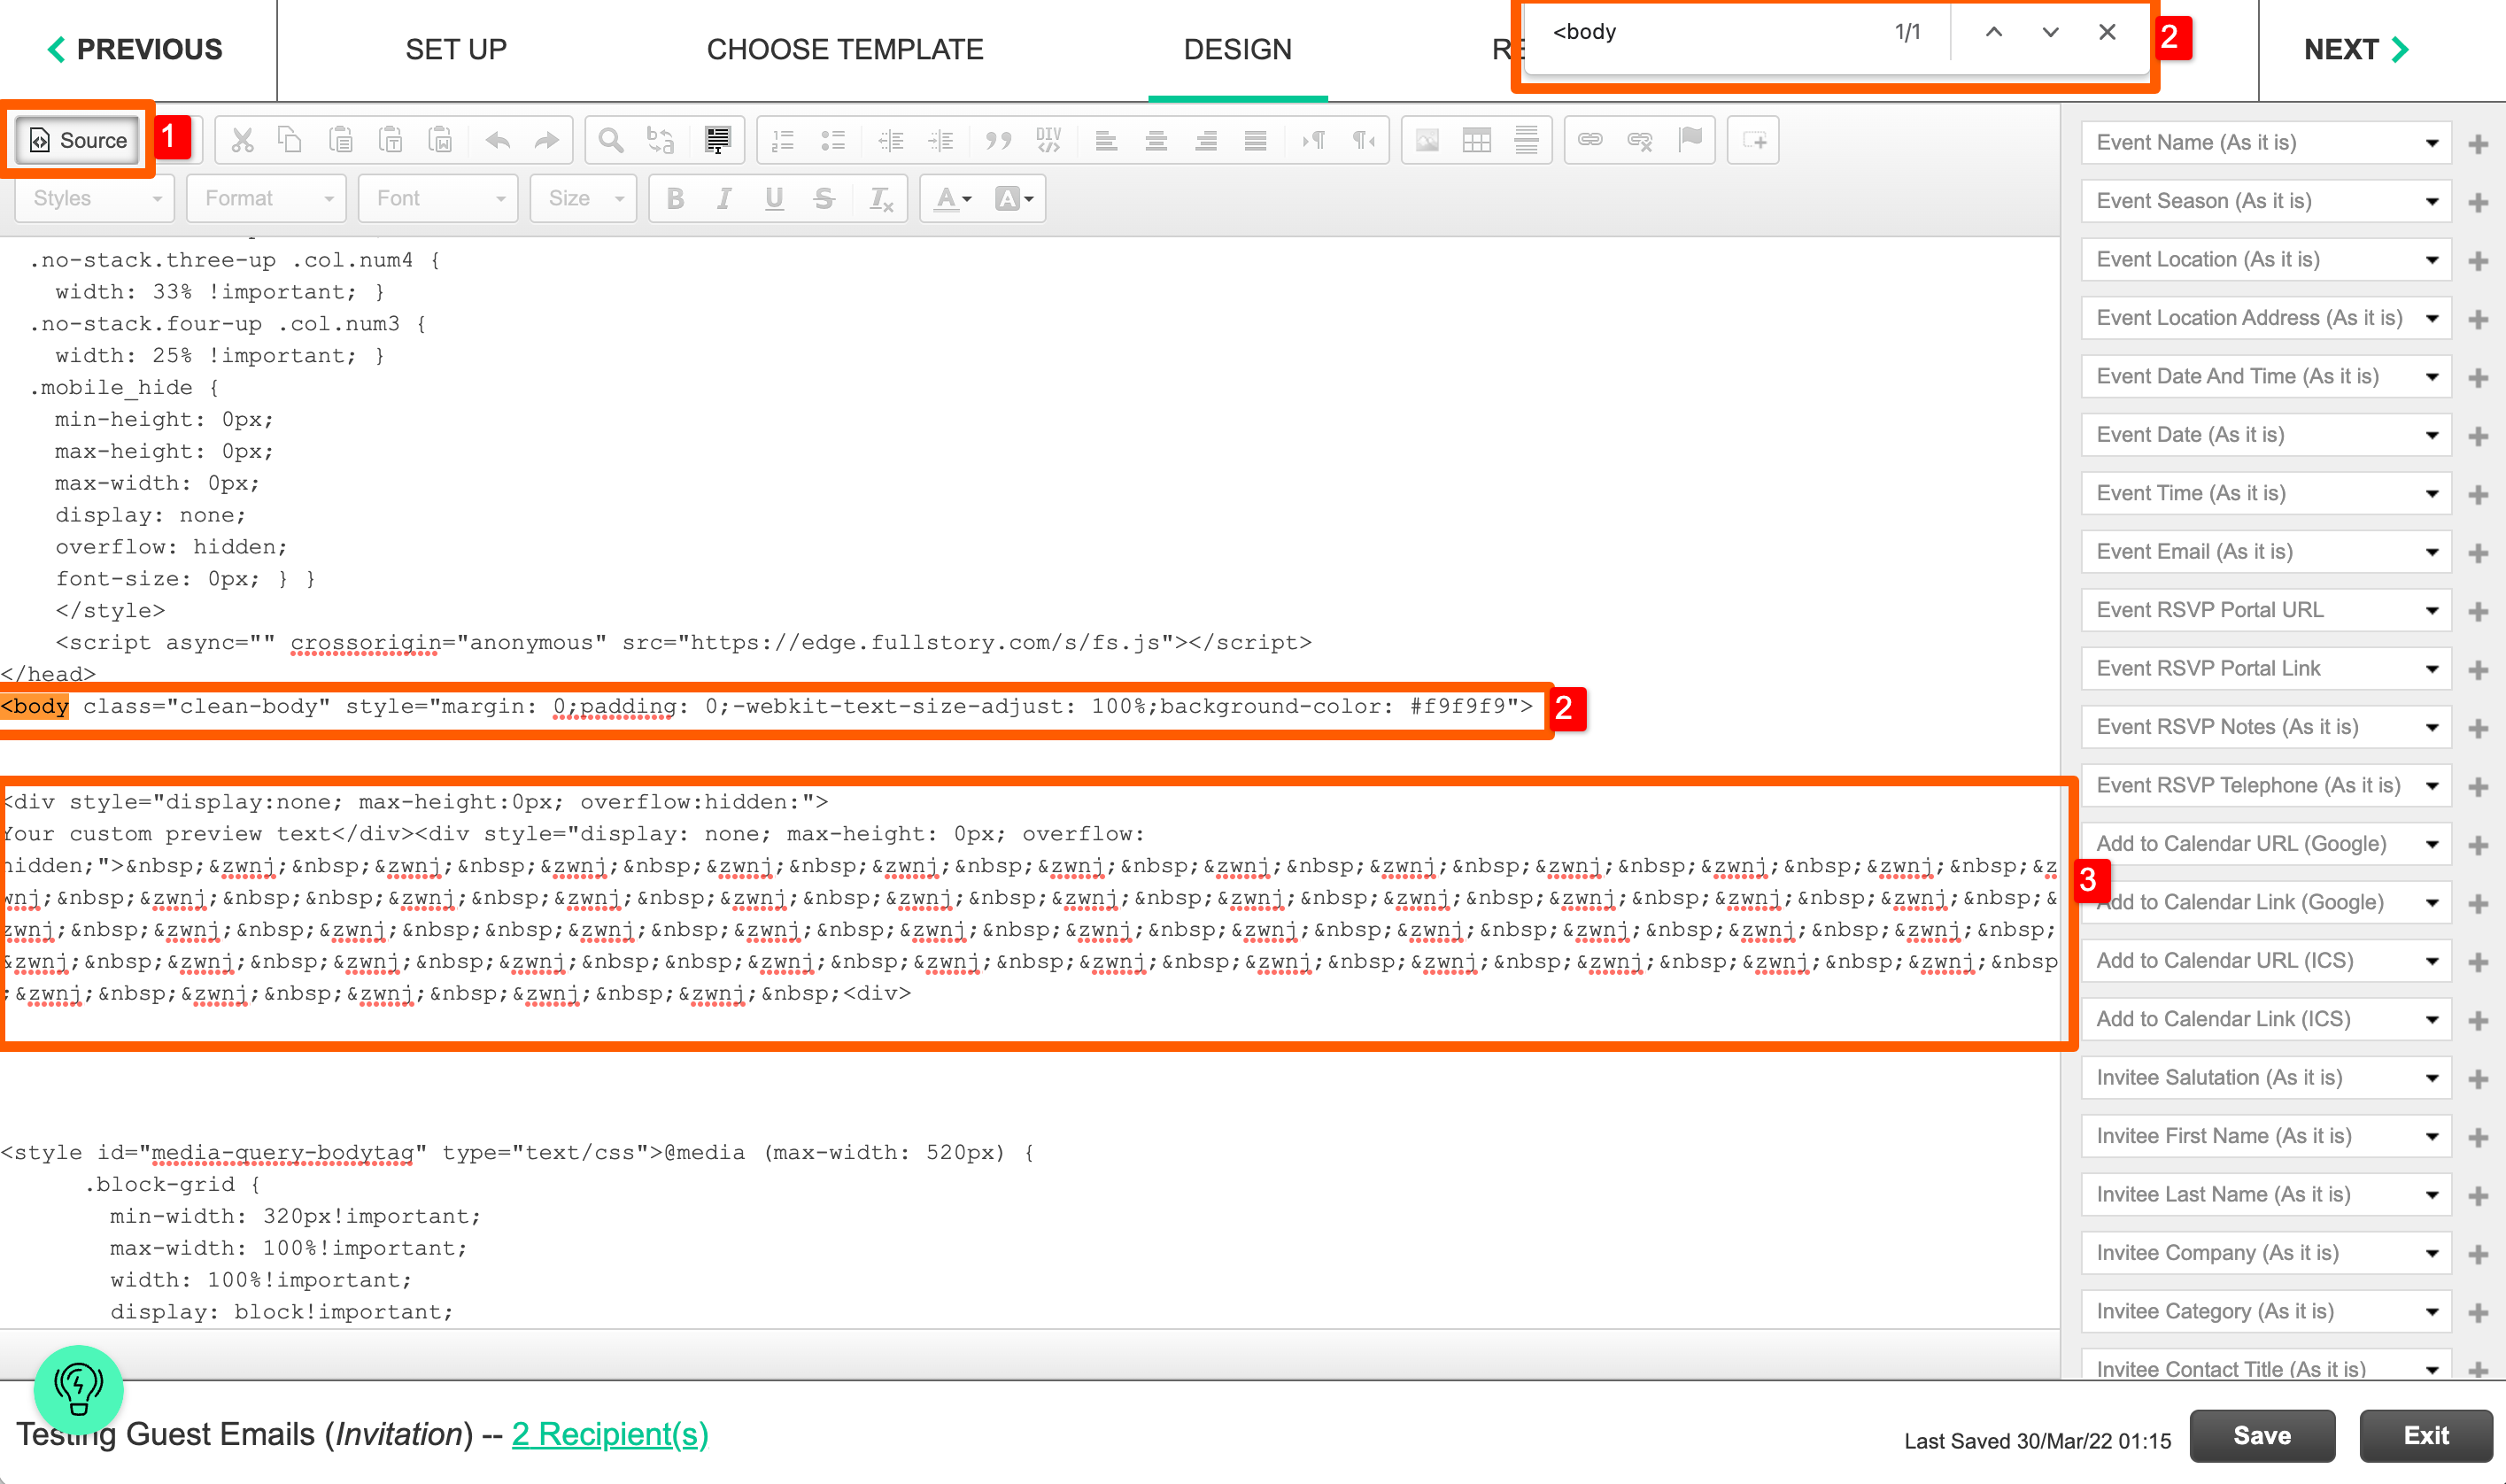
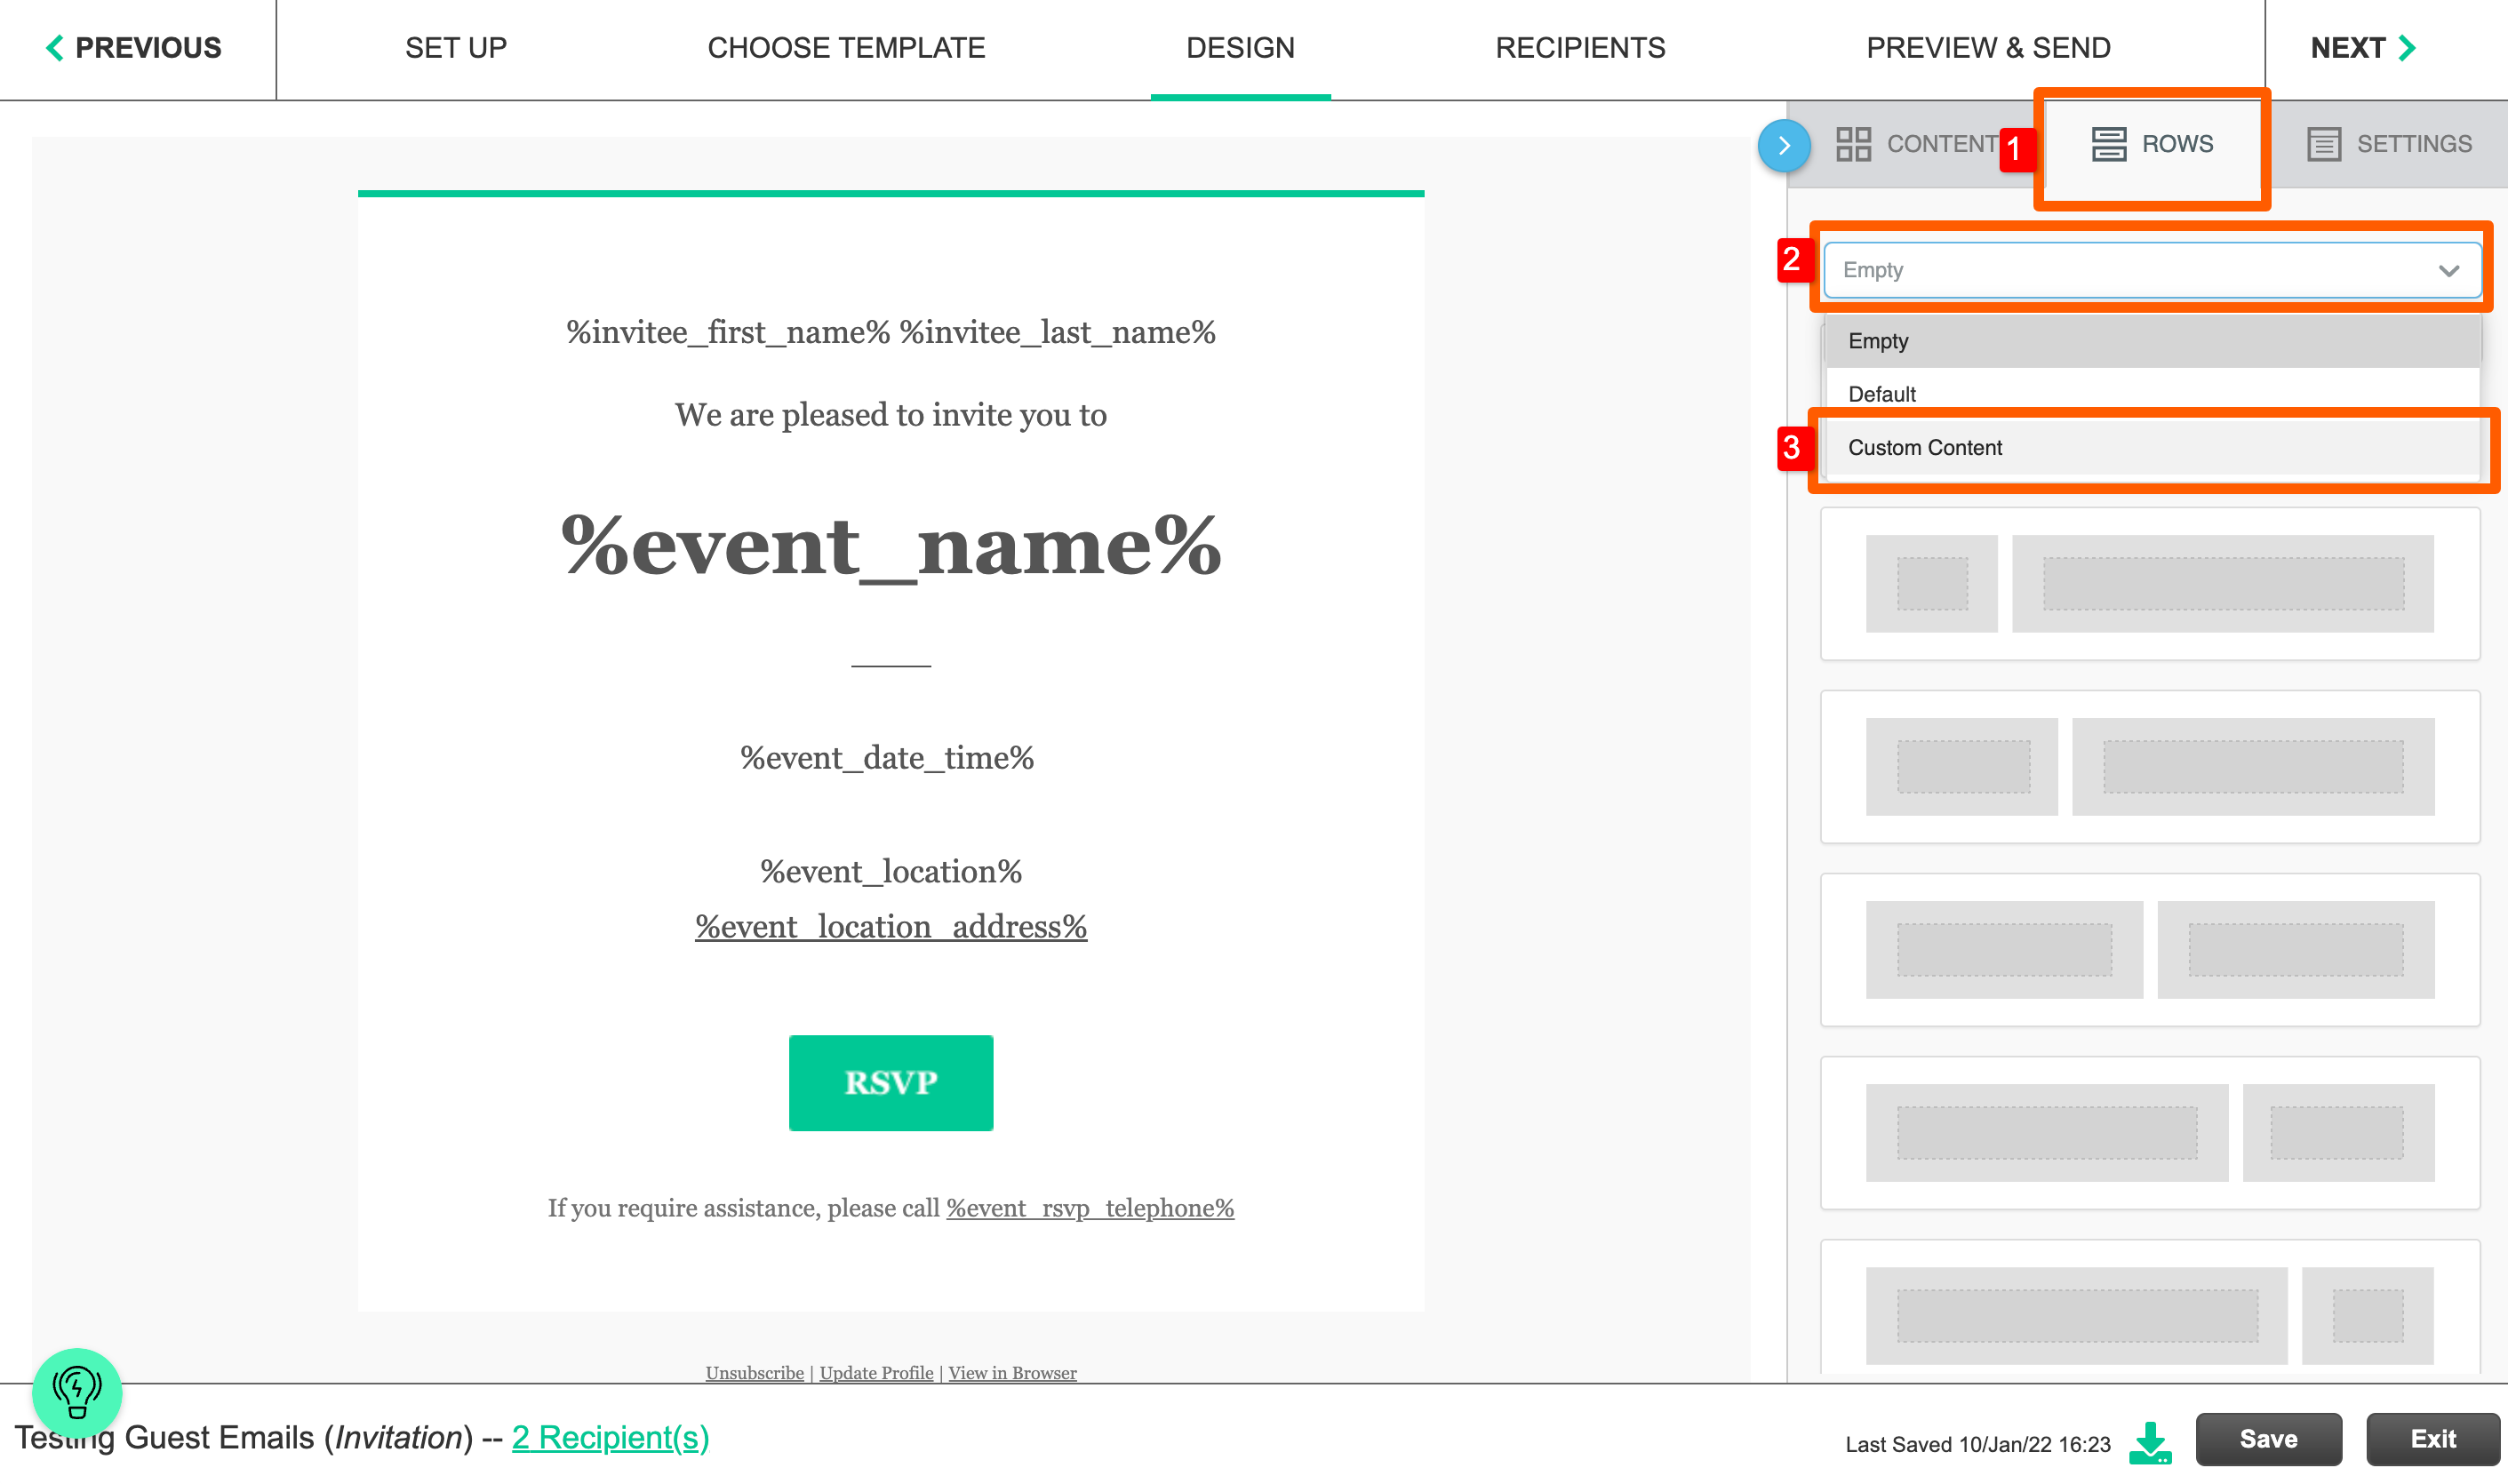
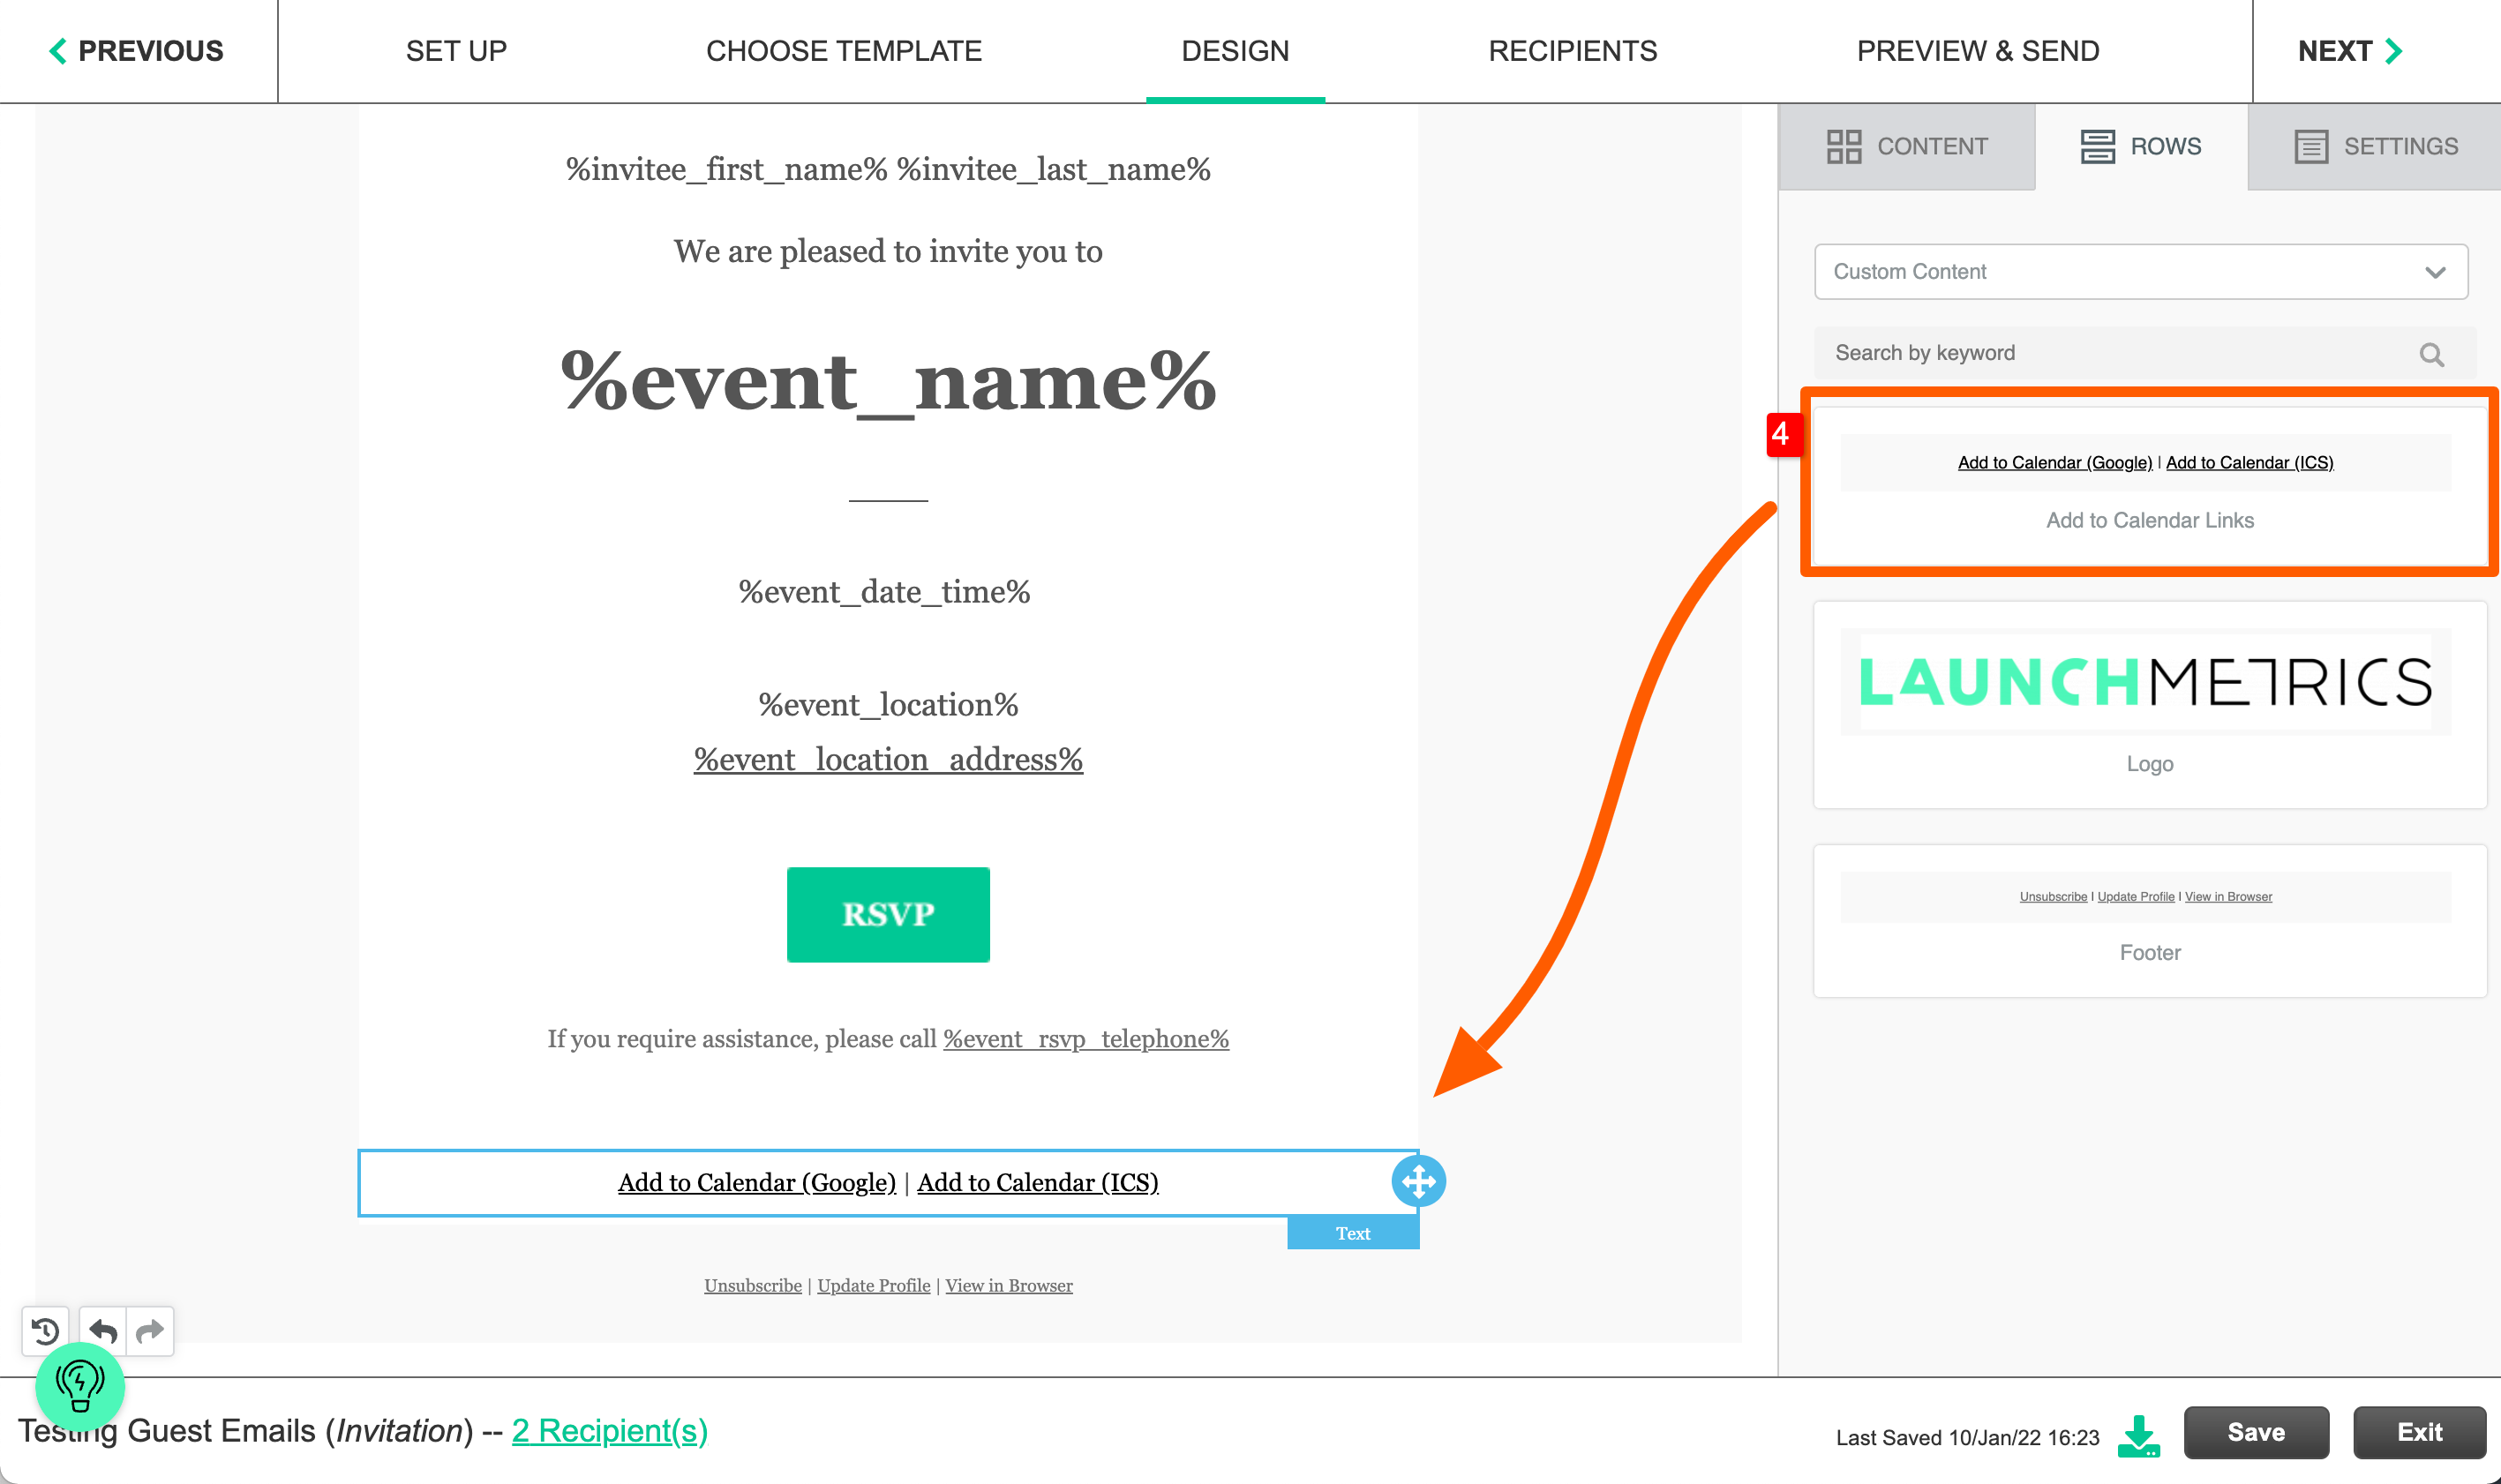
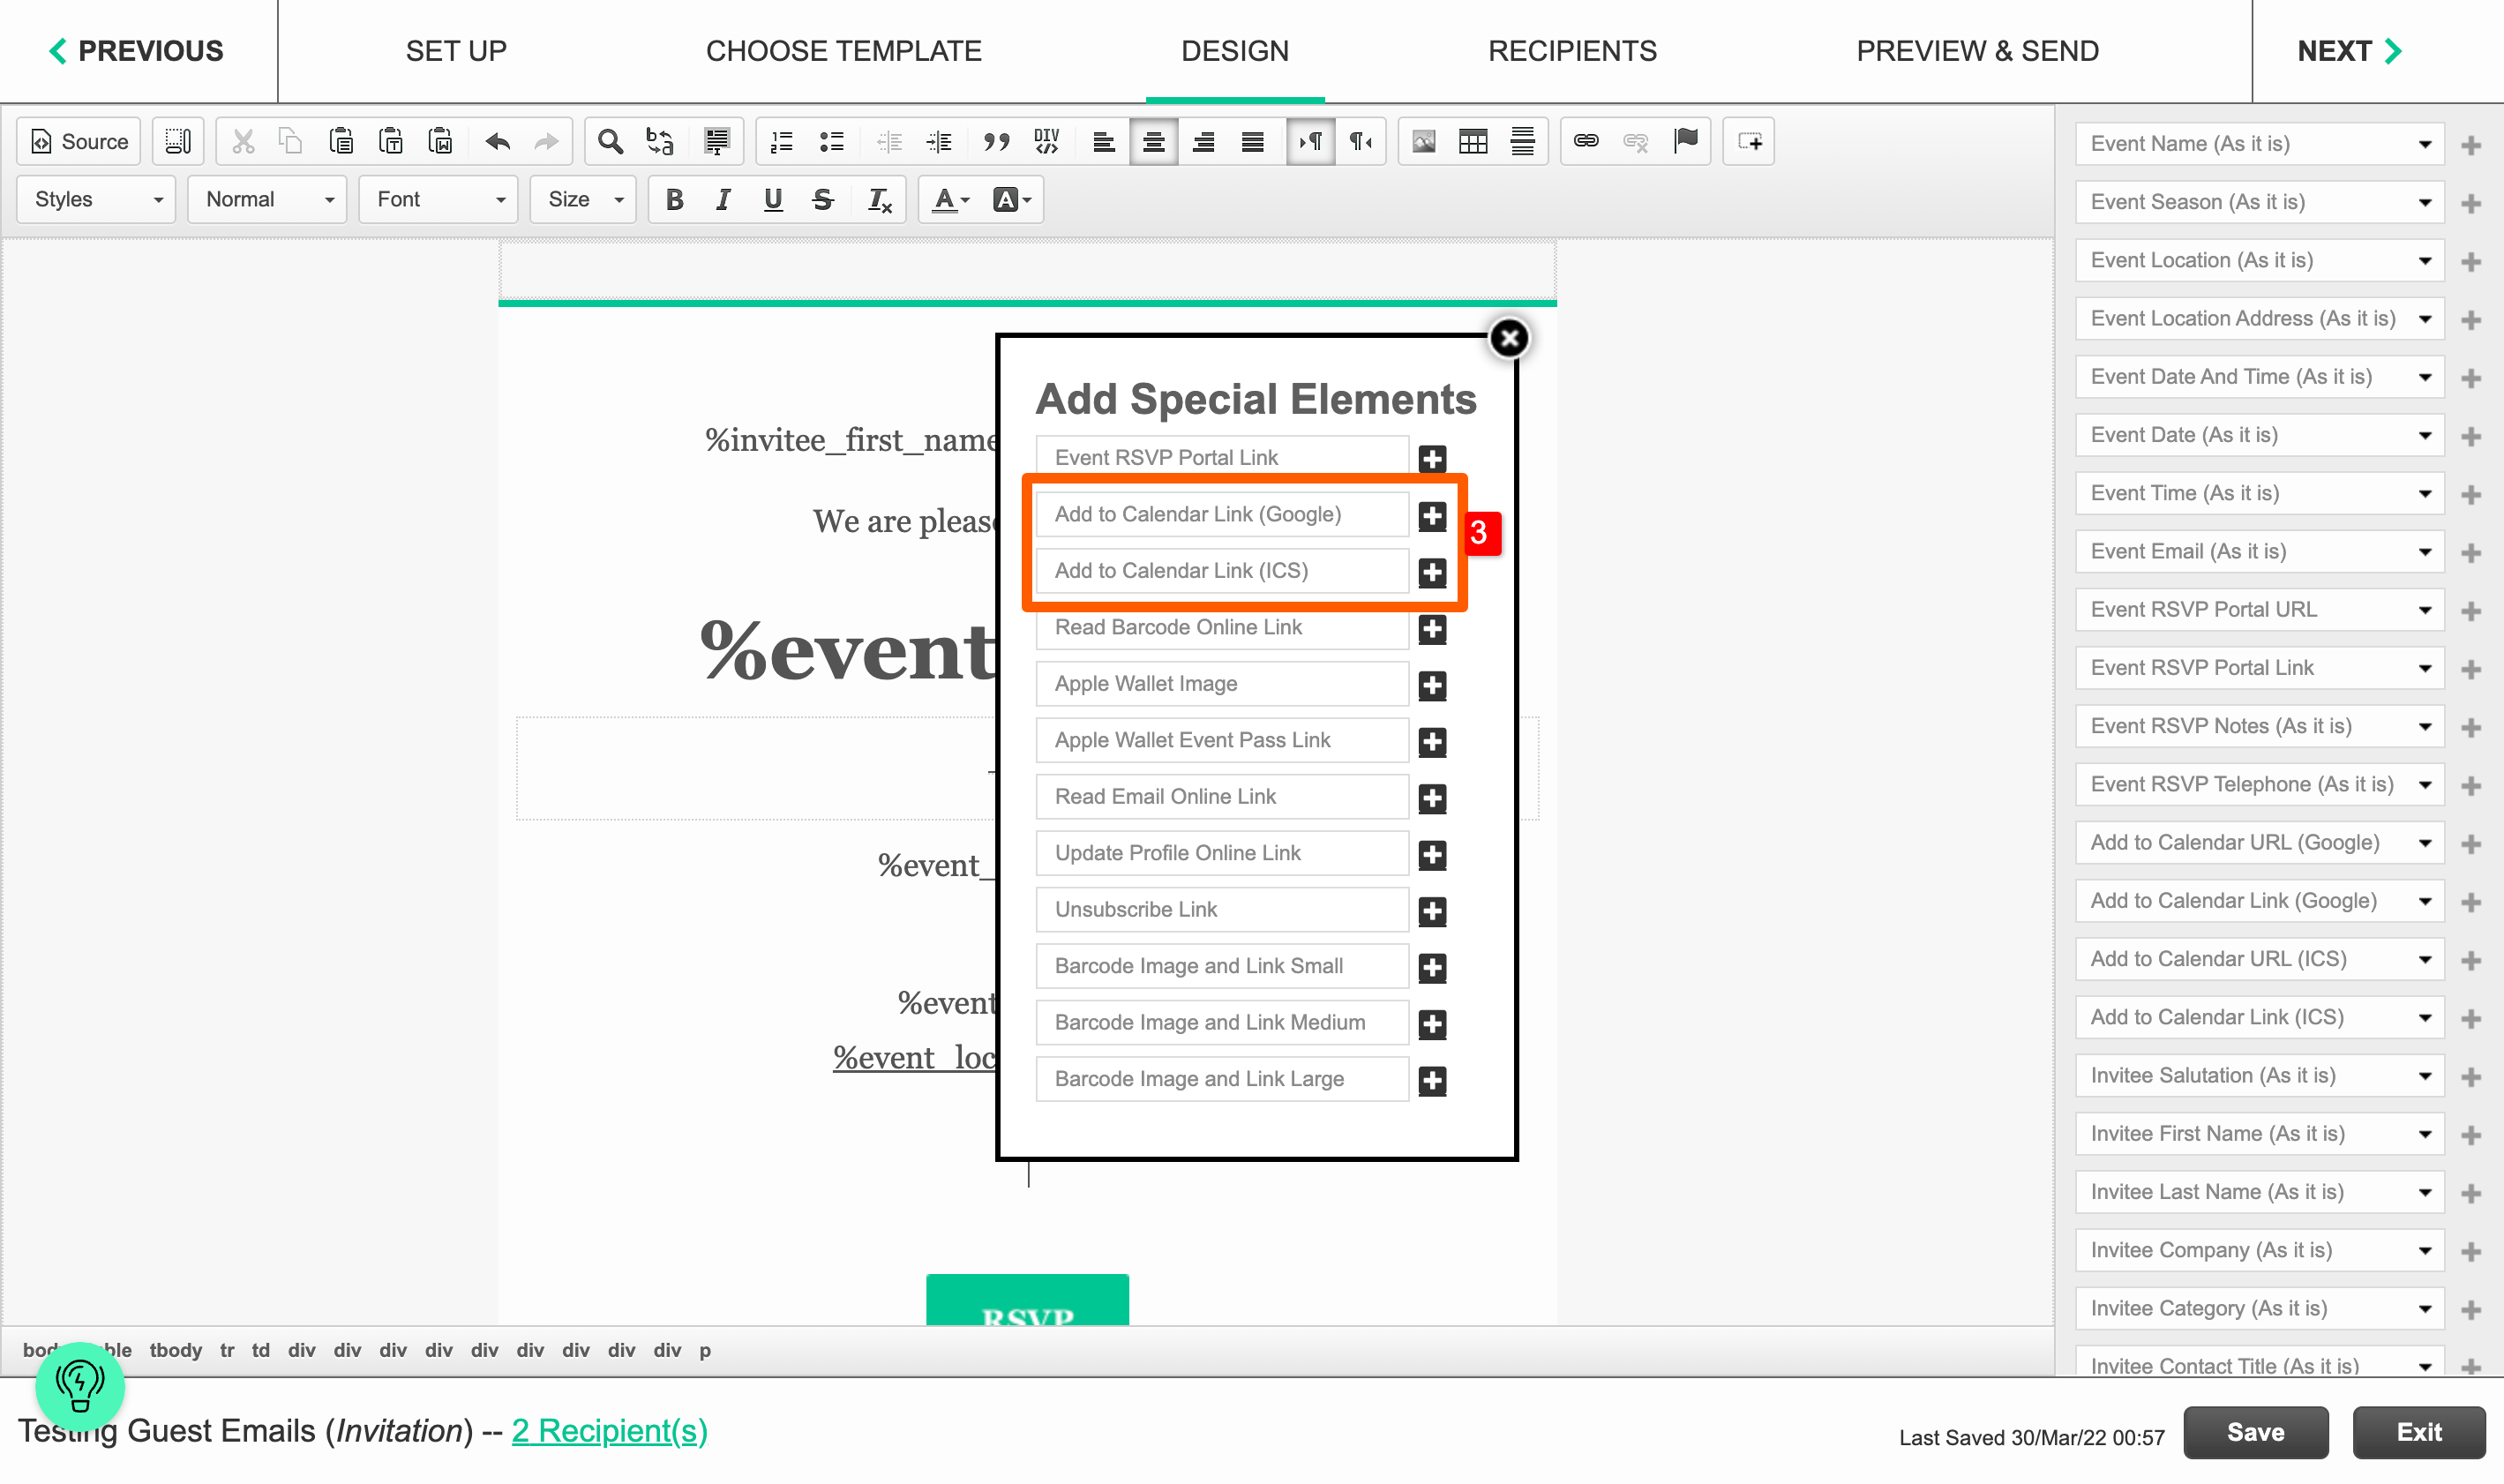
メールに「カレンダーに追加」リンクを含めるにはどうすればよいですか?
ドラッグ&ドロップモード
- デザインで、右側のパネルの「ROWS」タブをクリックします。
- 最初のドロップダウンを開きます。
- 「Custom Content」をクリックします
- 「Add to Calendar Links」要素を左側のデザインにドラッグします。
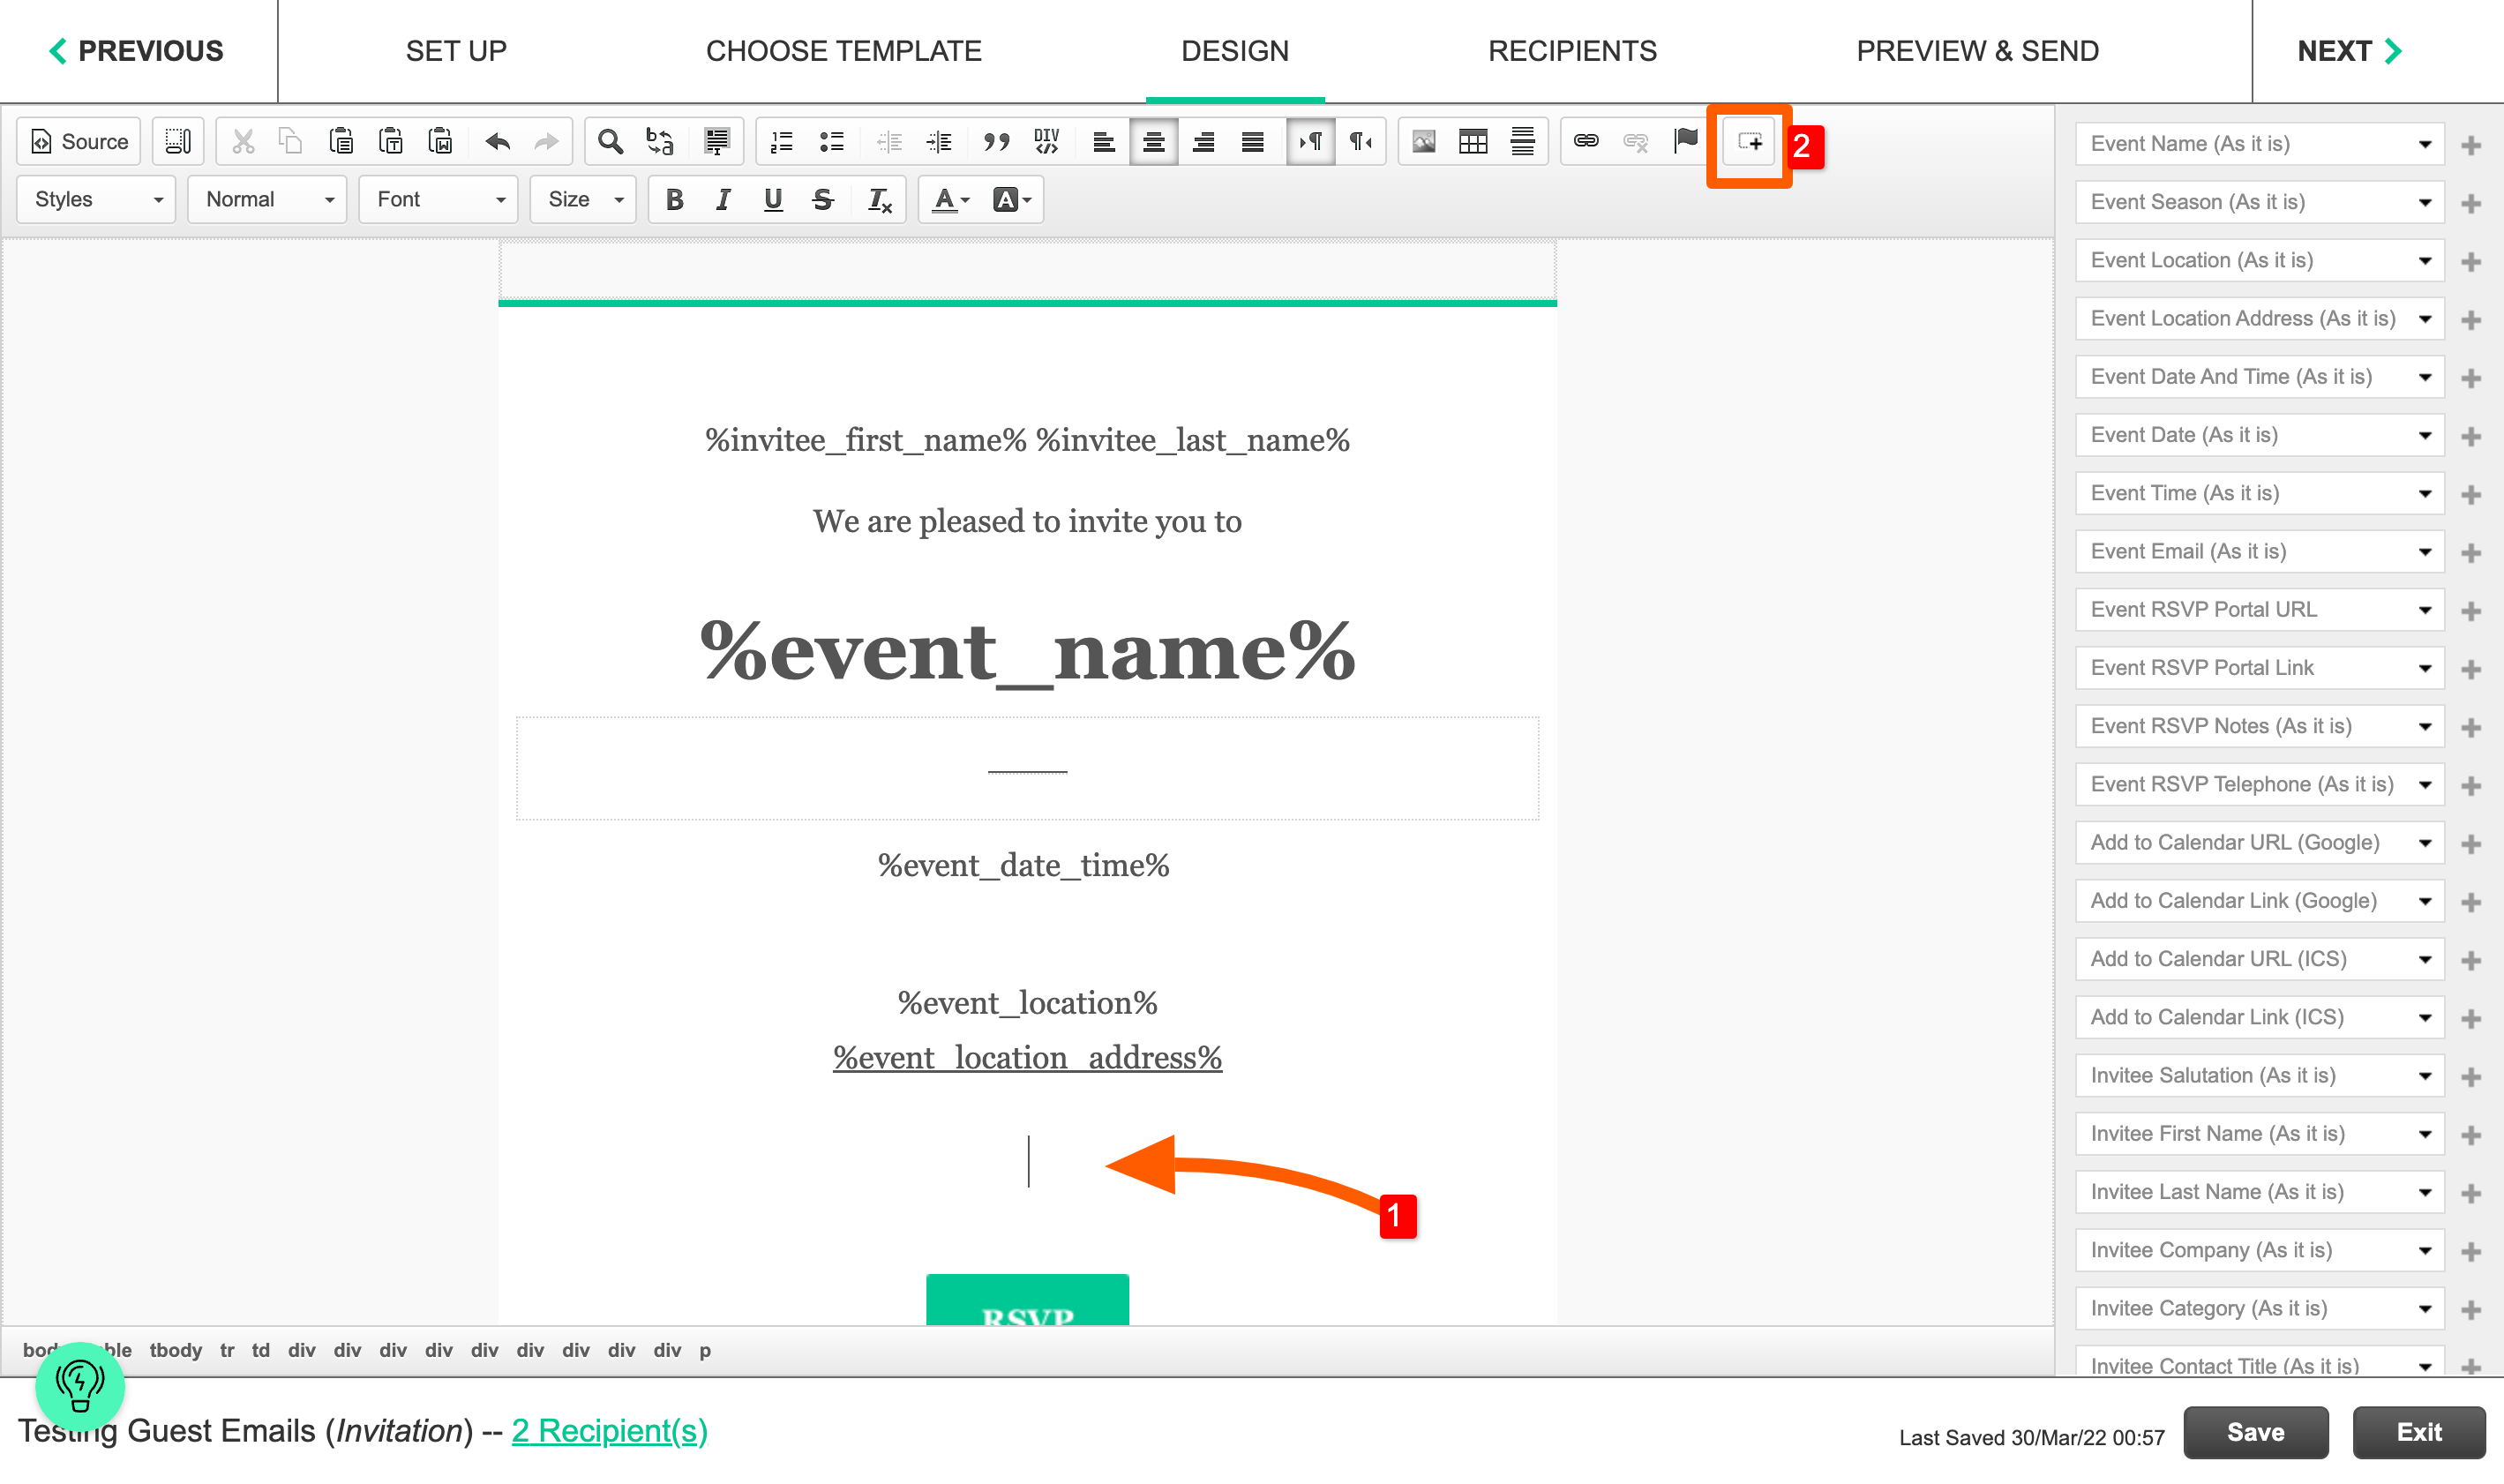
マニュアルモード
- メーリング ワークフローのデザイン ステップで、リンクを挿入する場所をクリックします。
- 「Add Special Elements」ボタンをクリックします

- 「Add to Calendar Link (Google)」の横にある + アイコンをクリックします。
- [Add to Calendar Link (ICS)] の横にある + アイコンをクリックします。
GIF ファイルをメールにアップロードすると、アニメーションが壊れたり停止したりするのはなぜですか?
ファイルの幅が 600 ピクセルを超える場合、メール ツールはファイルのサイズを自動的に変更します。GIF ファイルでアニメーションを機能させるには、ファイルを特定の方法で保存する必要があります。私たちのメール ツールはアニメーション GIF を区別しないため、その過程でアニメーションが失われます。これを修正するには、ファイルの幅が 600 ピクセル以下であることを常に確認してください。この無料ツールを使用してサイズを変更できます: http://gifgifs.com/resizer/