How to seat your invitees?
Seating invitees or guests is only available for In-person events where the seated option has been activated.

Seating Types
There are 3 different types of seating:
- Seated
- Invitees or guests marked as seated can be assigned a seat.
- Standing
- Invitees or guests marked as standing cannot be assigned a seat.
- Priority Standing
- Invitees or guests marked as Priority Standing cannot be assigned a seat.
Custom Standing Type
You can create more standing types with the help of your Customer Success Manager.
Custom standing types will behave like the standing category, and invitees or guests in these categories cannot be seated.
For each extra type activated, you will get:
- an additional option in the seating state dropdown.
- additional statistics columns in Events manager
- additional statistics columns in the RSVP Report
Please note that custom standing types are not actionable on mobile. Custom standing types will displayed on mobile but you we do not offer the options to transition people to custom standing types.
In Invitee Manager
You can assign seats to invitees and guests from the Invitee Manager page.
To do so, you must have the Seating & Seats columns in your search results layout preferences.

The Seating type must be set to seated to allow assigning a seat.
Once the Seat dropdown is activated, you can select a specific section and the row if applicable, or a specific table. Then type in the seat number and save.

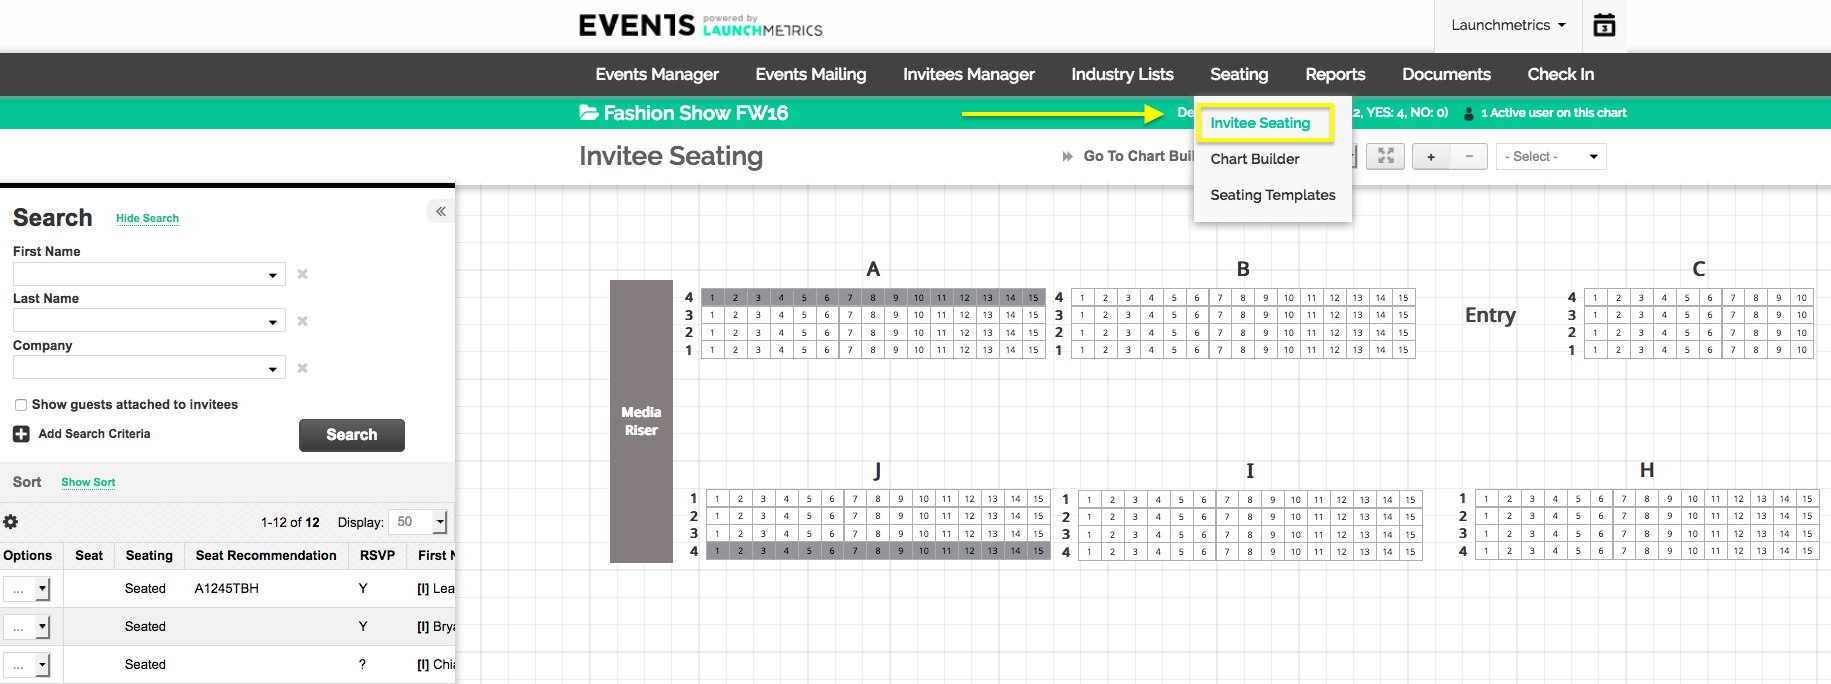
In Invitee Seating
Invitee Seating vs Chart Builder
The Invitee Seating page is where you can assign seats to your invitees and guests, while the Chart Builder page is where you can design your seating chart.
You cannot modify your seating configuration from the Invitee Seating page.
The Invitee Seating page offers a visual way to seat your invitees or guests as you get a view of the seating chart.
How to Seat Invitees & Guests
Assign Empty Seat
There are multiple ways to assign an empty seat to a guest or an invitee:
- Click on the invitee you wish to seat, then click on the seat you wish to assign
- Click on the seat you wish to assign, then click on the invitee or guest you wish to seat from the dropdown menu
- Click on the seat you wish to assign, then search for an invitee or guest and click on it in the search results
- Drag an invitee from the search section, and drop into the seat you wish to assign
Assign Taken Seat
When a seat is taken, you can double-seat another invitee, swap seats between two invitees, or take over the seat following the same steps as assigning an empty seat.

Double-seating can be disabled with the help of your Customer Success Manager.
Move Seated Invitee to New Seat
To move an invitee already seated, click on the invitee in the seating chart, then click on another seat.
The seating assignment of the invitee or guest will be updated to your latest selection.

Searching and Sorting Invitees
In the Invitee Manager page, you can use the search section on the left-hand side of the screen to select which invitee or guest you wish to seat.
You can easily add search criteria or select certain fields to be displayed in your search results.
- Click the gear icon (above Options) to customize header fields.
- Double-click or drag-and-drop Available Headers to make them Selected Headers within your Invitees list.
You can also sort your Invitees in ascending or descending order by clicking Apply Sort.
- Sorting fields include: Company, First Name, Last Name, Job Title, Region, Category, Type, RSVP Status, Seating, Seat Label
Clicking the options dropdown for each Invitee will allow you to:
- Unassign Seat (only if the invitee has already been seated), Assign To Standing, Assign To Priority Standing, Change RSVP, Edit Contact Details, View Contact Details

Customize the Invitee Seating View
From the toolbar at the top of the Invitee Seating page, you can customize the information displayed on your seating chart.
Click on Options to access the following options

- Seat Layout Preferences allows you to select which information to display for each invitee or guest within the seating chart.
-
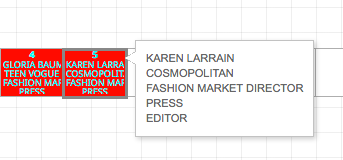
Edit Colors allows you to assign a color to each Contact Category.
- In the example above, the category PRESS has been assigned the color red.
-
Show RSVP State allows full color-coded visibility on the RSVP status of each invitee or guest.
- Green = Yes, Red = No, Gray = Pending.

- Hide RSVP State allows to hide the RSVP status from the seating chart.

You can also customize the display of your seating chart using the following options:
- View Full Screen allows for larger chart visibility within the web browser. This will not take over the entire computer screen.
-
+ / - Icons allows you to zoom in or out of the chart.
- Invitee or guest information will only be visible when the + icon has been clicked at least once.
- Select dropdown allows you to select any specific seating elements (section) you would like to focus on.
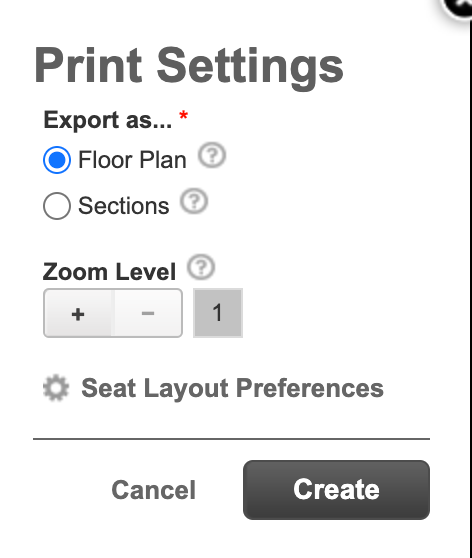
Export your Seating Chart
You can easily export the seating chart as a PDF file and print if needed, by clicking on the Printer icon.

There are 2 options to export the seating chart.
- This can be done as a Floor Plan to export the entire Seating chart as is, which includes runway or other shape elements.
- When exporting as a Floor Plan, use the Zoom Level settings to improve visibility on Invitee details who have been seated.
- The other option is to export as individual Sections.
- This option will allow you to select exactly the individual Sections you would like to be exported.
- This export will provide a view of seated invitee details