
Creating an Event
Learn how to create and edit your event

To create a new event, click “Create Event” in the upper right corner of the page.
The mandatory fields are marked with a red asterisk(*).
Department owner: This is the department of users who will have access to the event.

Seating: Select the seating style for the event, either a Seated Event or No Seating is needed. (multi-day & multi-timeslot events don't support seating)


Start and end time: This is the time of your event. Please note this is formatted by default using 24-hour time.

To make the event time appears in a 12-hour format on your invitation and RSVP page, be sure to toggle “Use 12 Hours Format” on the Event planning section.

Event Location: Start typing the address of the event and choose it from the dropdown list, after that, all of the information will be displayed and can be also edited.

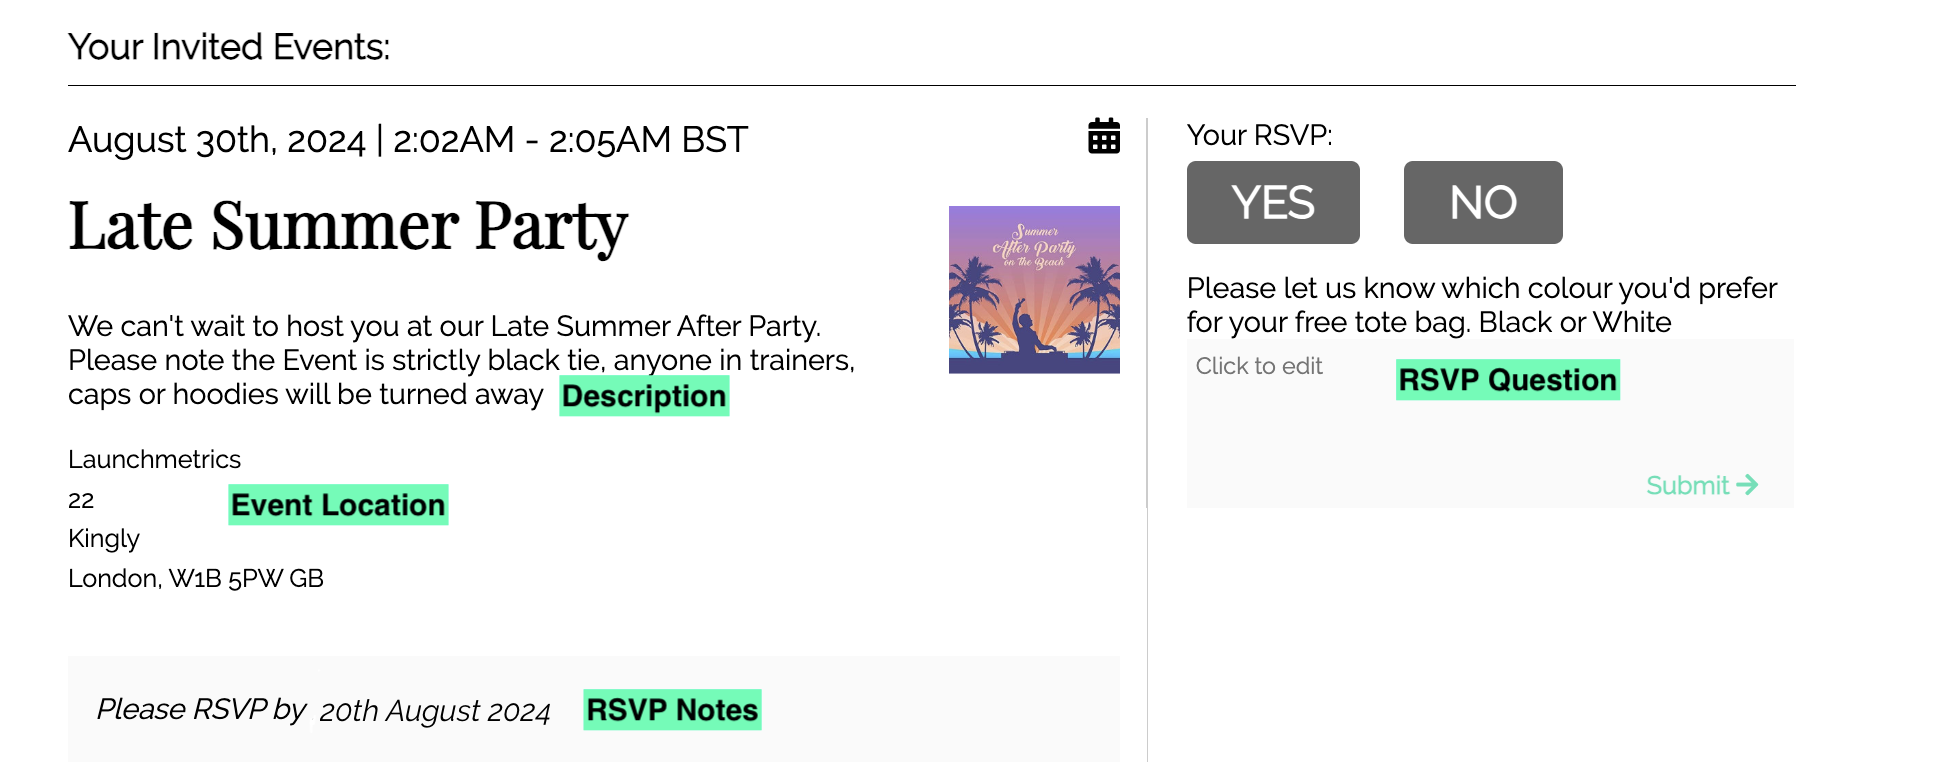
- Event Description: This field is used to add in any descriptions about the Event that you'd like your Invitees to see. This will appear on your RSVP page.
-
Event Type: This is the kind of event you are hosting. This information is only internal.

- Event Email:This is the default email address from which all event RSVP emails will be sent. Although this is the default, you can still change it when you are setting up your Events Mailings.
Basic details: Enter the basic details, then choose “Add more details” to customize further— or create the event and come back to edit it later.

-
Event Season: This is the season corresponding to the event.
- Guests : the number of guests you define under "Guest limit" will be the default number of +1s that invitees will be able to bring to the event. If you set this limit to 0, you can still assign a number of guests to your invitees via the invitees manager.

-
RSVP Phone: Use the number of the person managing your RSVP's as this will appear on your RSVP page.
-
Rsvp Notes: This field is used for any notes you'd like your invitees to know about. This will appear on your RSVP page.
-
Event Hashtag: This is for internal reference
- Enable QR Code Check In: Enabling this option will allow users to include an InviteeQR Code within any Events Mailing e-mail template.

- QR Code customization: After enabling QR code check-in, you’ll be able to customize the QR code from the “Branding” section.

- Ask Invitee a question upon RSVP: Enabling this option will allow users to ask invitees a question upon RSVPing.

This question will be displayed during RSVP, and invitees will be able to respond before submitting:
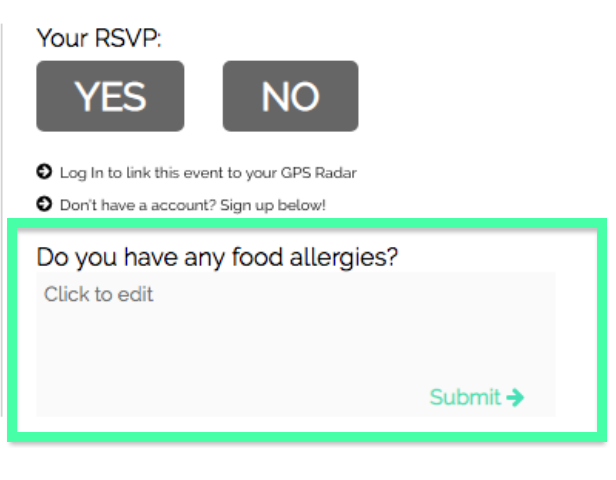
-
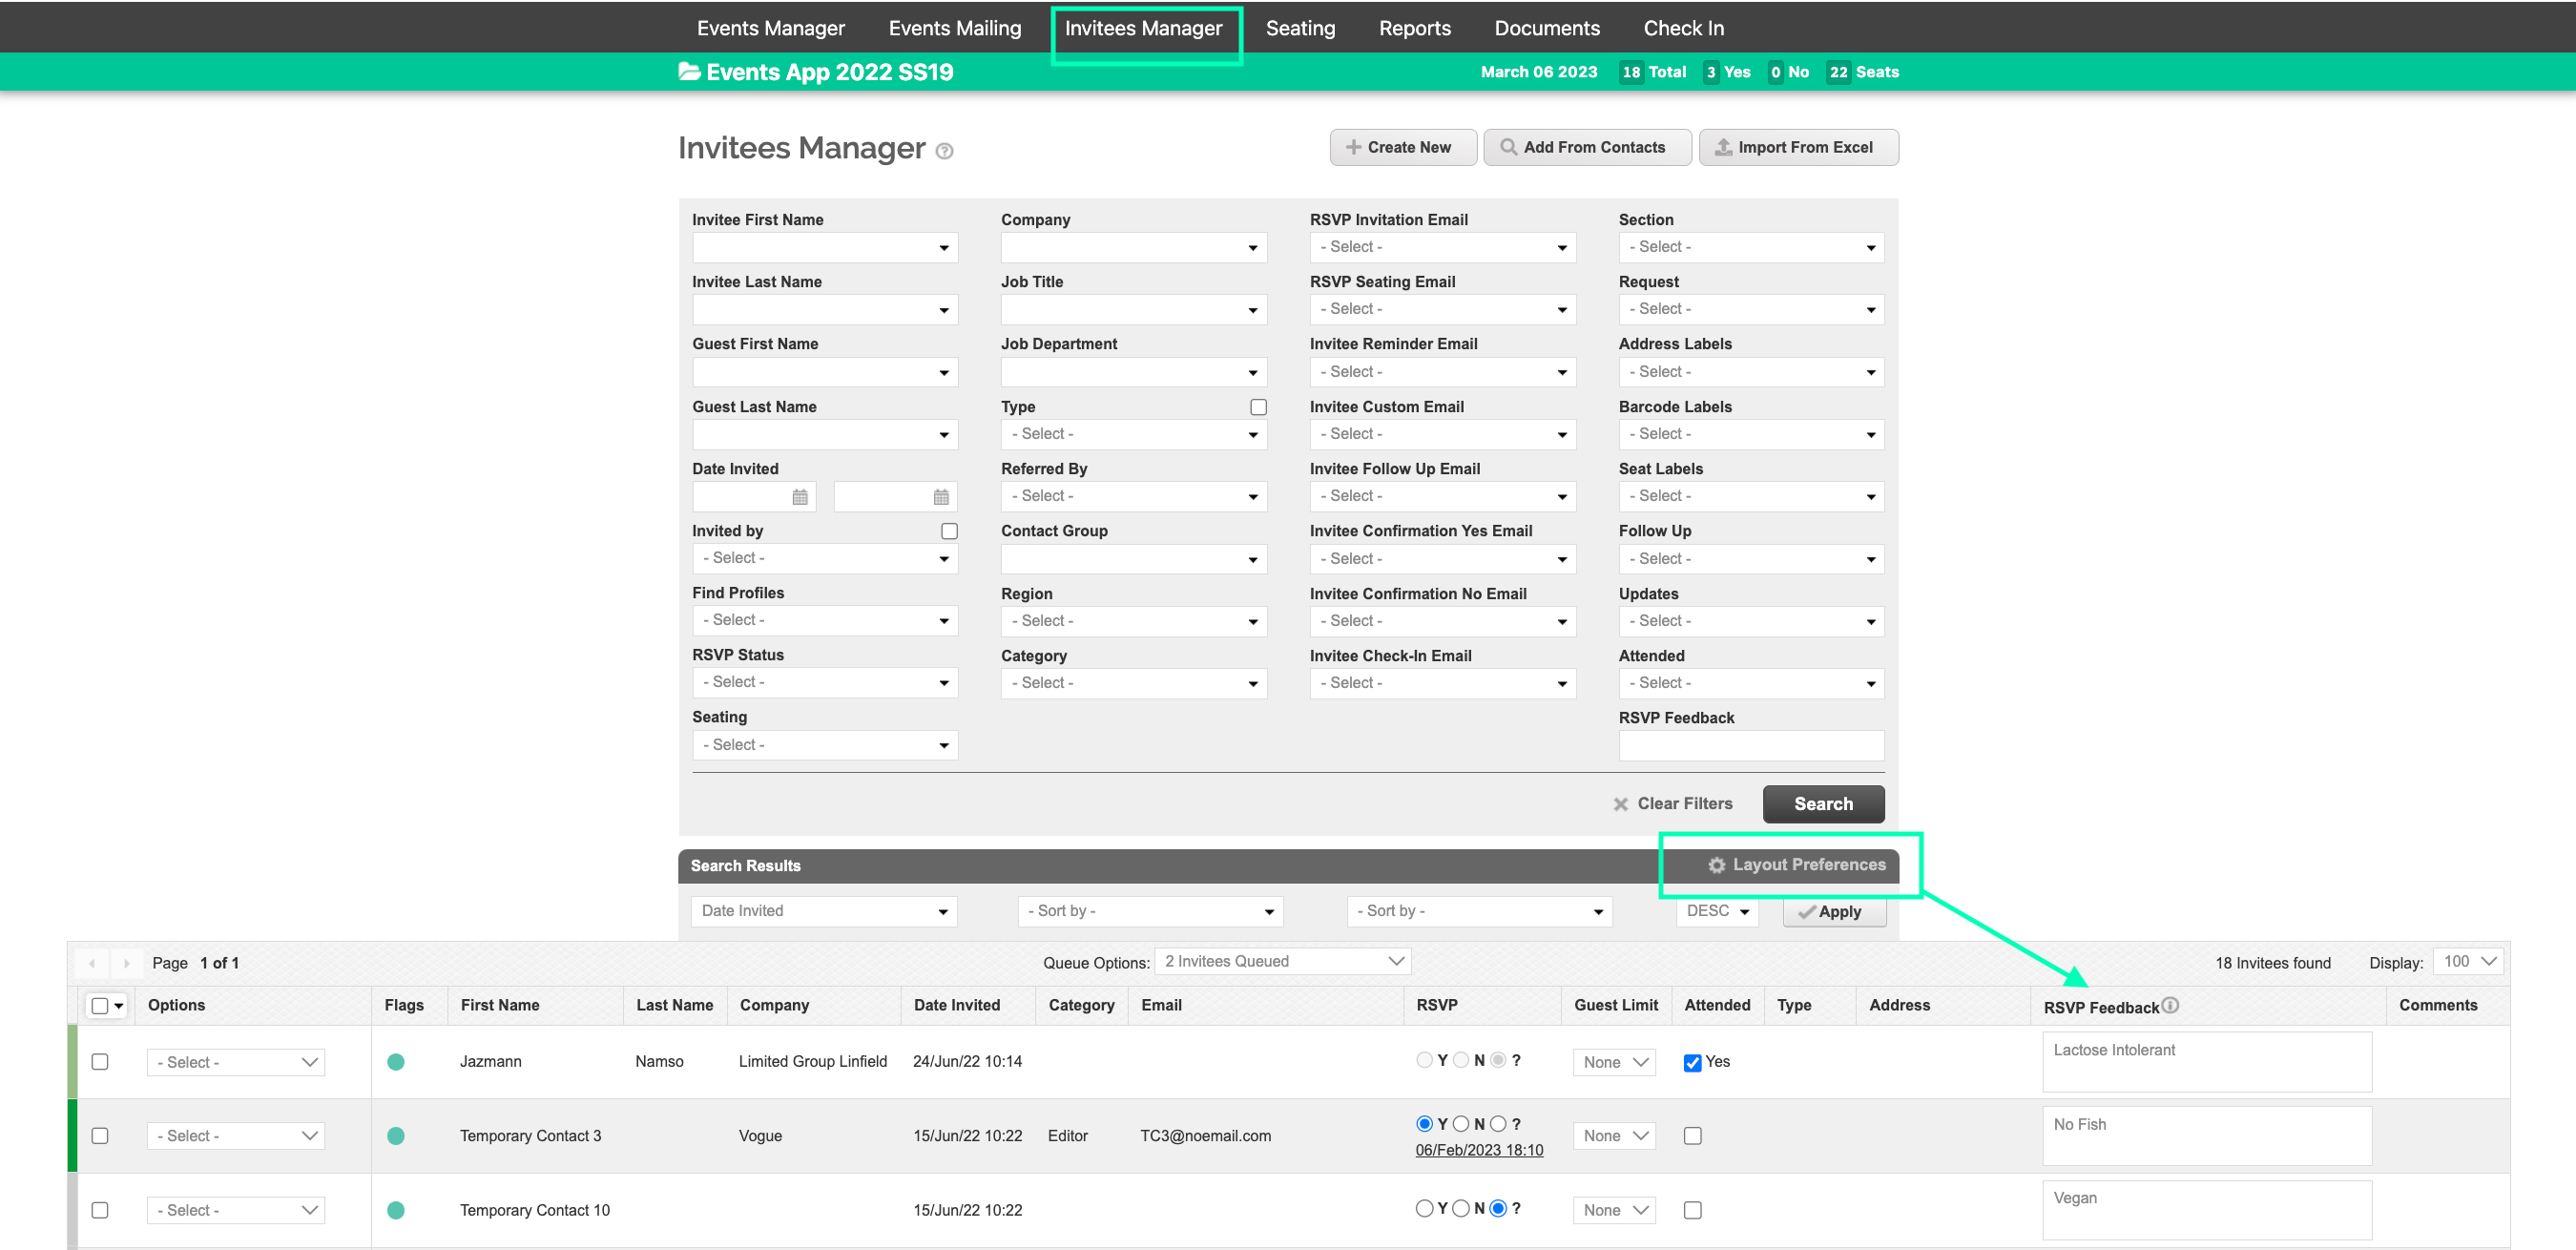
Answers are able to be seen by using the Layout Preference RSVP Feedback within the Invitees Manager.
Notify with RSVP changes after: This is a very useful field for 'Seated Events'. By setting a Date that is typically 1-2 days before the Event Date, if an Invitee changes their RSVP, this will send an email alert to the email address that is set in the 'Event Email' field.

 RSVP Landing Page