
This article will walk you through how to format your logo before uploading it to your address label printer.
Your logo must be formatted as follows:
- 600px X 100px or smaller
- Black & white and converted to Bitmap
- Rotated 90 degrees counter clockwise
- Saved as PCX
- Open the logo in Photoshop.
- Adjust the image size by going to Image menu > Image Size.
Make sure that:
Constrain Aspect Ratio is turned on
Units are set to Pixels
Resample is turned on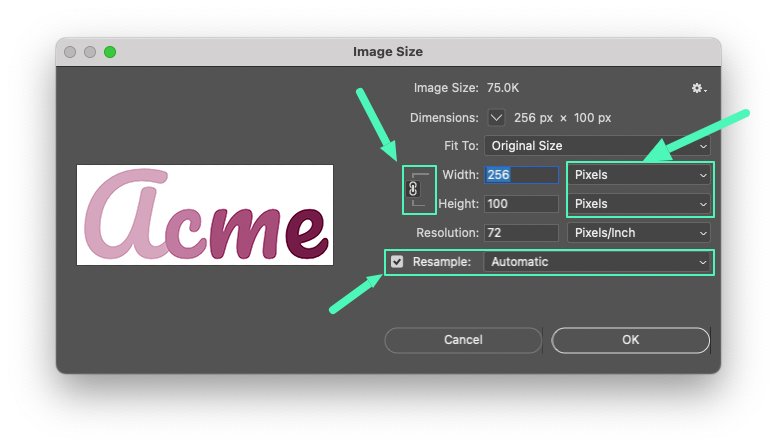
Change the longest side (usually Width) to 600 pixels, then check whether the other side has scaled down to under 100 pixels.
If the shorter side is still over 100px, change the shorter side to 100px. The longer side will automatically scale down a bit to maintain the aspect ratio.
Click OK.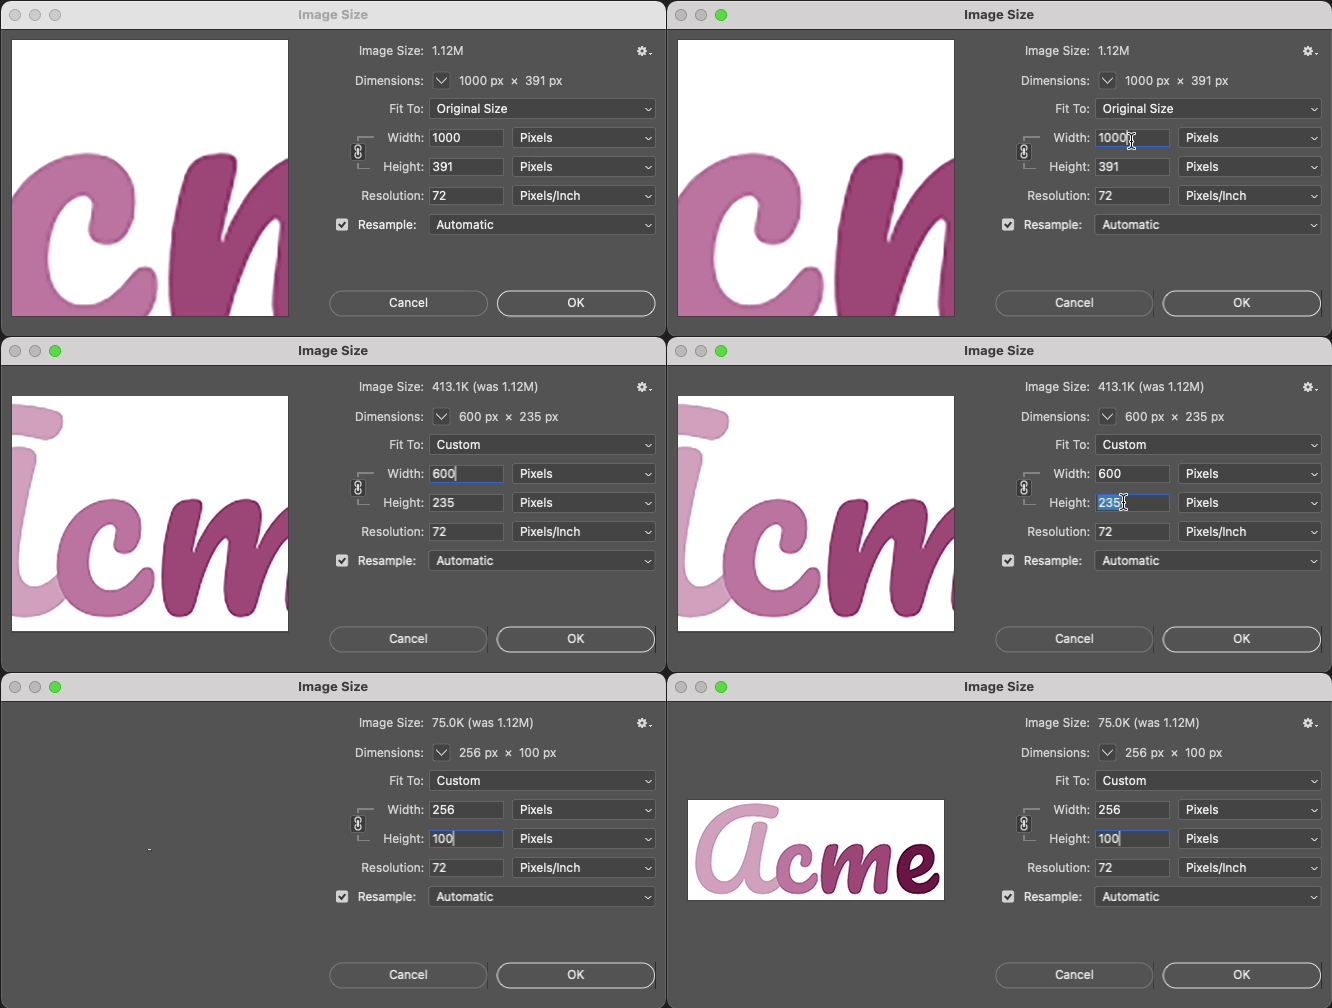
-
Convert the image to grayscale by going to Image > Mode > Grayscale.
You'll likely be prompted to confirm you want to discard the color information, click Discard.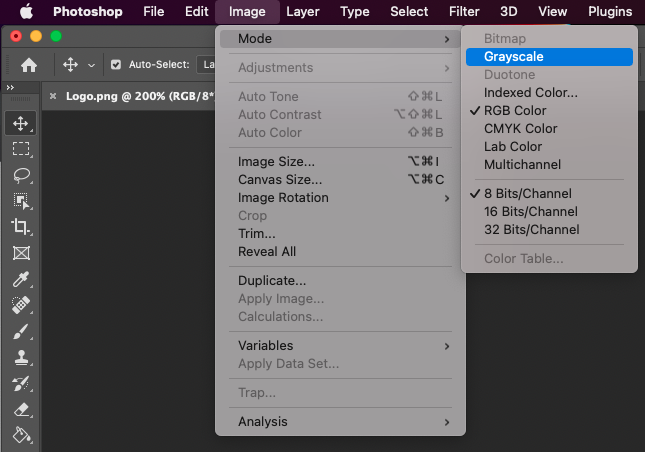
-
Adjust the Brightness / Contrast by going to Image > Adjustments > Brightness/Contrast.
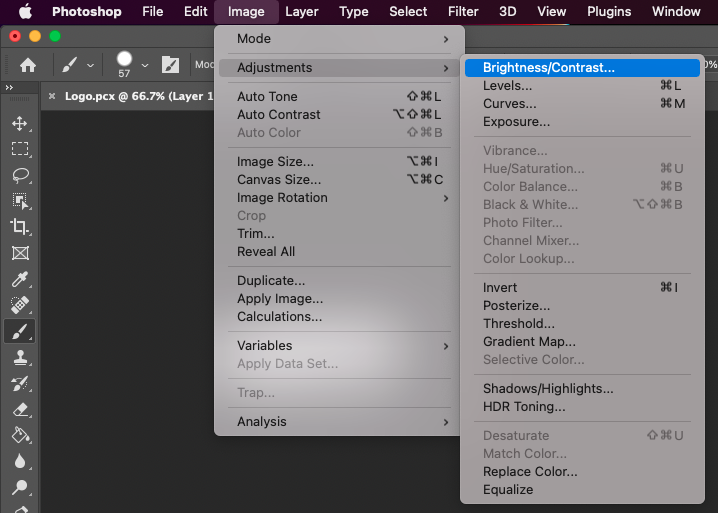
Bump the contrast up high and adjust the brightness as needed.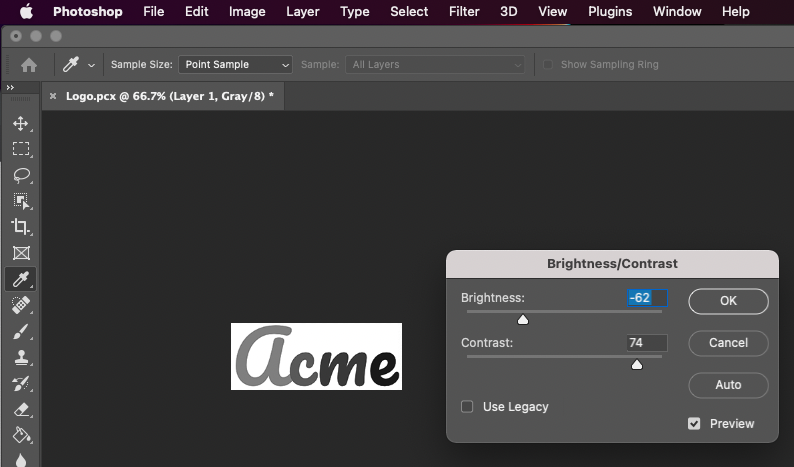
-
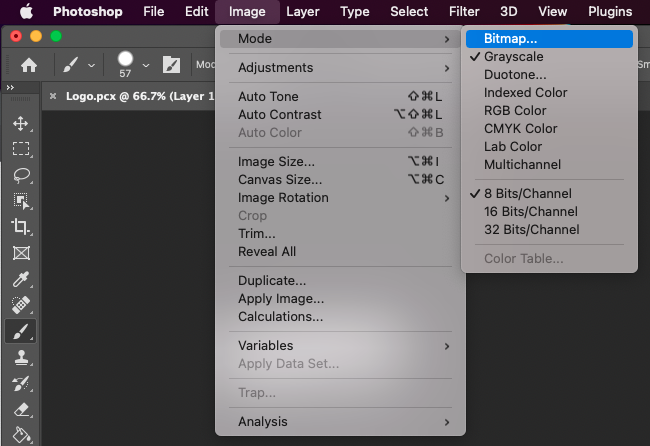
Convert it to bitmap by going to Image > Mode > Bitmap.
For the Method option, use whichever looks best. Once you click OK, zoom out to about 66% to get a sense of how it'll look printed.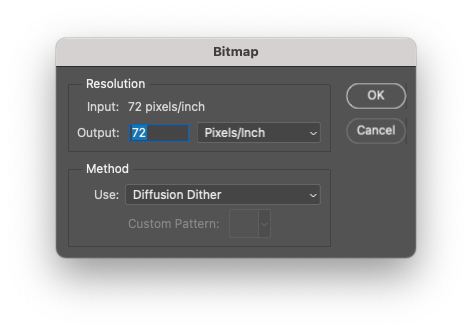
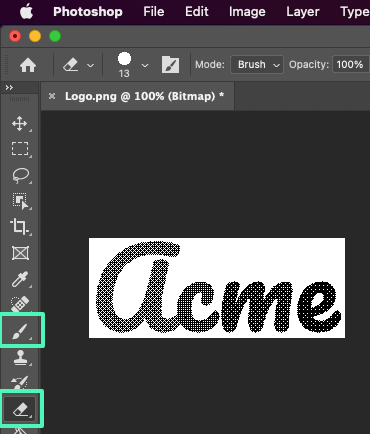
- Use the Eraser or Brush tool to clean up any extra or missing pixels.
-
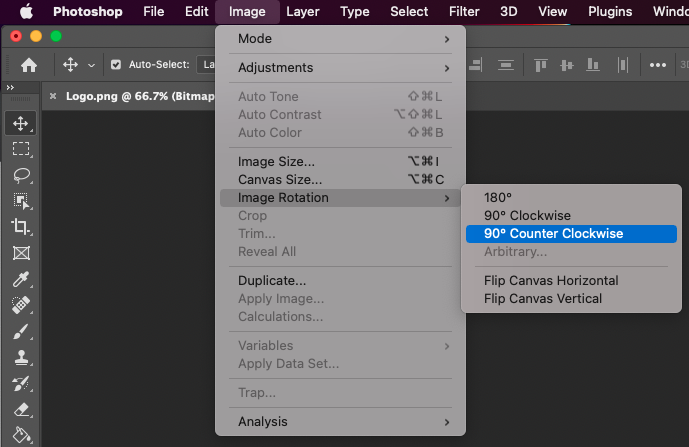
Rotate your logo by going to Image > Image Rotation > 90 Counter Clockwise
-
Save your file by going to File > Save As
Save your file as .PCX using a filename of 5 characters or less.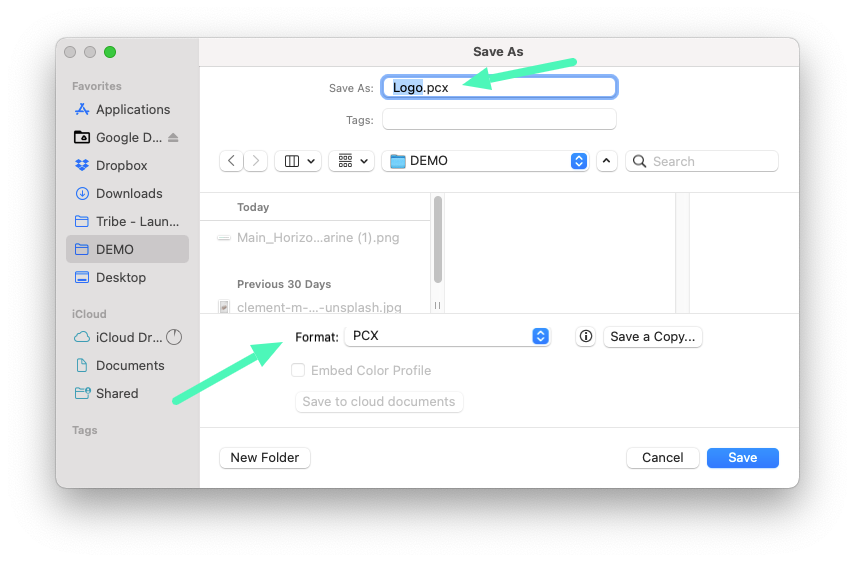
That's it, your logo is formatted and ready to upload!
NEXT: Uploading your Logo to an Address Label Printer